The Samsung Galaxy S26 user guide is more than just a booklet; it is a complete learning companion for your phone. It explains everything from basic setup to advanced features in simple, step‑by‑step language that beginners and seniors can easily follow.
Clear instructions for setting up your device, inserting SIM cards, and completing the initial configuration.
Easy explanations of core features such as calls, messages, Wi‑Fi, Bluetooth, and mobile data.
Helpful tips for using the camera, security options, and Samsung services more effectively.
With the manual on hand, you no longer need to guess how something works on your S26; you can simply look it up and follow the instructions.
Where to Download the Galaxy S26 User Guide PDF Free
Samsung provides official manuals for its Galaxy phones through its support websites, so you can download the Samsung S26 user guide as a PDF at no cost. Using the official source is important to ensure the information is accurate, updated, and safe.
To get the Galaxy S26 user manual PDF for free, you can:
Visit Samsung’s official Support or “Manuals & Downloads” page for your region, such as Samsung US or Samsung Indonesia.
Enter “Galaxy S26” or your specific model number in the search field, then open the product support page.
Look for the “User Manual” or “Manuals and Downloads” section and select the full user manual in PDF format.
Some third‑party sites also provide guidance and direct links on how to find and download the Galaxy S26 manual PDF, but you should always verify that the file ultimately comes from Samsung’s official servers for security and accuracy.
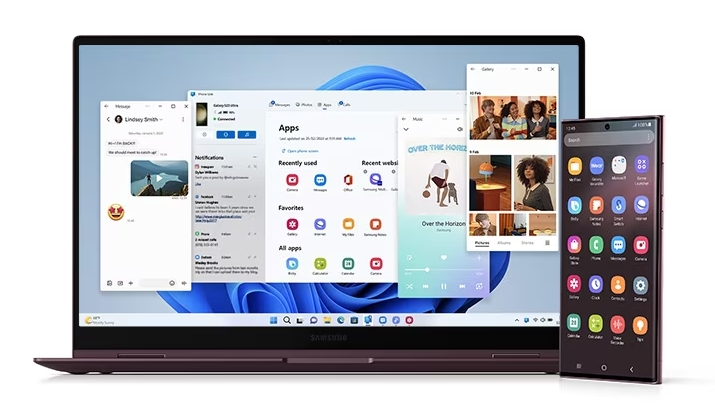
How to Access the Manual Directly on Your Phone
You do not always need a computer to read the S26 Ultra manual. Samsung allows you to access helpful guides and manuals directly from the device itself. This is useful if you want quick instructions while holding your phone.
On most recent Galaxy devices, you can:
Open Settings, then scroll down and look for items such as “Tips and user manual”, “Help”, or “User manual”.
Tap that menu to open built‑in help content and links to the full manual or online guide.
Use the search bar inside the help section to find topics like battery, camera, or security.
In addition, Samsung’s support pages allow you to open the PDF manual in your browser, where you can zoom, search by keyword, or download it for offline viewing with any standard PDF reader.
What the Galaxy S26 User Guide Covers
Once you download the Samsung Galaxy S26 manual PDF, you will find a well‑structured document that walks you through your phone from the basics to more advanced options. It is designed so that even users with very little technical experience can follow along comfortably.
Typical sections you will find include:
Getting started: Device layout, buttons, SIM and memory card, charging, and first‑time setup.
Accounts and backup: Samsung account, Google account, data transfer from your old phone, and backup options via Samsung Cloud or other services.
Home screen and navigation: Using One UI, app drawer, notifications, quick settings, and gesture navigation.
Camera and media: Shooting photos and videos, using different camera modes, managing your gallery, and basic editing tools.
Connectivity: Setting up Wi‑Fi, Bluetooth, mobile hotspot, NFC, and nearby device connections.
Security and privacy: Screen lock methods, fingerprint, face recognition, Samsung Pass, and privacy settings.
Battery and maintenance: Power‑saving features, fast charging tips, Device care tools, and storage management.
Troubleshooting: Simple solutions for common problems like slow performance, connection issues, or app errors.
Because it is a PDF, you can easily search for any word or phrase, which makes finding specific instructions much faster than flipping through a paper booklet.
Tips for Using the PDF Manual Effectively
To get the most value from your free Galaxy S26 manual PDF, use it as an everyday reference, not just something to read once. A few practical habits can make it far more useful.
Some simple tips include:
Save the PDF in an easy‑to‑reach folder on your phone or in a cloud service like Samsung Cloud or Google Drive.
Use the built‑in search function in your PDF reader whenever you are unsure about a setting or feature.
Bookmark important pages such as camera tips, security features, or troubleshooting so you can open them quickly later.
Check the support page from time to time to see if Samsung has released an updated manual after software updates or major One UI changes.
By treating the manual as a handy digital handbook, you will feel more confident exploring new features and customizing the phone to match your daily routine.
Final Thoughts
The Samsung Galaxy S26 user guide and official manual PDF are essential tools for making the most of your smartphone, especially if you are a beginner or upgrading from an older device. With a free, easy‑to‑download PDF and on‑device access to tips and help, you always have clear instructions available whenever you need them.
Instead of learning by trial and error, you can follow step‑by‑step guidance, discover hidden features, and quickly fix minor issues on your own. Download the Galaxy S26 manual today, keep it close, and enjoy a smoother, more confident experience with your powerful new Samsung Galaxy S26.
Getting the most out of your new iPhone 17 Pro Max starts with knowing where to find clear, accurate instructions. With every new iPhone generation, Apple packs in even more features and customizations. Finding the right iPhone 17 Pro Max manual ensures you can unlock all these capabilities right from the start. Whether you’re new to Apple devices or upgrading from an older model, having the user guide for iPhone 17 at your fingertips makes setting up and exploring your phone a truly enjoyable experience.
Where to Find the iPhone 17 Pro Max Manual
Apple provides official user guides online that cover every iPhone model and iOS version. Here’s how to find the latest manual for your iPhone 17 Pro Max:
Apple Support Website: Visit the official Apple Support page for iPhone manuals. You’ll find manuals, technical specs, and downloadable guides specific to the iPhone 17 Pro Max. The manual is available as a convenient web-based guide, which you can also view as a PDF or download for offline use.
Direct Guide for iPhone 17 Pro Max: The user guide is tailored to iOS 26, matching your iPhone 17’s software. This one-stop manual includes all features and specialized settings unique to your device.
Apple Books App: The official iPhone 17 user guide is also available for free in the Apple Books app. Search for “iPhone User Guide” in Books, download it, and enjoy offline access anytime you need help.
Third-Party Tech Sites: Trusted websites may offer easy-to-read, printable user manual PDFs with added tips and troubleshooting tricks for beginners. These guides often highlight features and provide illustrations for extra clarity.
What’s Inside the iPhone 17 Pro Max Manual?
The iPhone 17 Pro Max manual is your go-to resource for:
Setup Instructions: Clear steps to activate your phone, transfer your data, and configure security (Face ID, passcodes, and privacy).
Feature Highlights: Tips on using the advanced camera system, customizing your lock screen, exploring Apple Intelligence (AI-powered tools), and more.
Troubleshooting: Solutions for common problems like connectivity issues, app crashes, and slow performance.
Accessibility & Customization: Guidance on hidden features, accessibility options, and shortcuts to make your iPhone fit your lifestyle.
Regular Updates: Manuals are routinely updated as new iOS versions come out or features get enhanced, so it’s wise to check for new editions periodically.
How to Download Your Manual
Follow these quick steps for instant access:
Visit the Apple iPhone Support Guide for the latest interactive manual.
If you prefer a downloadable version, trusted sources like the iPhone 17 Manual or reputable tech support sites offer free, printable manual PDFs.
To read on your device, open the Apple Books app, search “iPhone User Guide for iOS 26,” and add it to your library for offline use.
No Apple ID is required to browse or download these manuals, and you’re free to print sections or keep a copy for easy reference.
Why You Need the Manual
Reading your iPhone manual is the quickest way to:
Discover time-saving shortcuts and hidden features.
Fix everyday issues without needing extra tech support.
Personalize your phone settings for security, privacy, and convenience.
Stay current with new features after software updates.
Conclusion
Finding and downloading your iPhone 17 Pro Max manual has never been easier. With the official Apple Support web guides and downloadable PDFs, all the information you need is at your fingertips. Be sure to take advantage of the manual’s powerful search and bookmarking features; your path to iPhone mastery starts here! Accessing the manual empowers you to confidently explore every feature and enjoy your new device to the fullest.
As we eagerly await the release of the new flagship smartphone, I’ll be keeping you informed about the latest developments regarding its launch. The anticipation is building up, and rumors are circulating about the features and specifications of the upcoming device. I’ll be covering all the latest news, rumors, and official statements to keep you updated on the Samsung Galaxy S26 launch date details.
Stay tuned for the latest updates on the launch date, and get ready to explore the exciting features that this new smartphone has to offer.
The Latest Samsung Galaxy S26 News
The wait for the Samsung Galaxy S26 is getting intense. Many sources are sharing the latest rumors and updates. It’s important to know what’s real and what’s just talk.
Recent Leaks and Rumors
Recent leaks suggest big changes for the Samsung Galaxy S26. They talk about a more powerful processor and better camera.
Official Samsung Statements
Even though Samsung hasn’t confirmed much, they’ve shown they’re all about innovation and making customers happy. As the launch gets closer, we’ll hear more from them. And who knows, maybe some surprises too.
Samsung Galaxy S26 Launch Date: Expected Timeline
As we look forward to the Samsung Galaxy S26 launch, knowing the timeline is key. The release date of this eagerly awaited device is a hot topic among tech fans.
Historical Release Patterns
Samsung has always released its Galaxy S series every year. The Galaxy S25 came out in early 2025. This might mean the S26 will also arrive in early 2026.
Usually, Samsung shows off its new flagship in February or March. This can happen at the Mobile World Congress or through an online event.
Industry Insider Reports
Industry insiders have been sharing details about the Galaxy S26 release date. Recent leaks suggest Samsung might stick to its usual release time. Some say it could be in February 2026.
Supply chain insiders say Samsung is gearing up for the S26 series production. Component suppliers also mention a production increase in Q4 2025.
Analyst Predictions
Analysts believe the Samsung Galaxy S26 will debut in the first quarter of 2026. This matches the company’s past release patterns and recent leaks.
Key Features Expected in the Samsung Galaxy S26
Enthusiasts are excited about the Samsung Galaxy S26. Rumors and leaks hint at big upgrades in several areas.
Processor and Performance Upgrades
The Samsung Galaxy S26 will likely have a new processor. It might be from Qualcomm or Samsung’s Exynos series. This means better performance and efficiency.
This upgrade will make the device faster and more responsive. It will be a big improvement.
Camera Innovations
The camera on the Samsung Galaxy S26 is expected to get a lot better. Leaks talk about new sensor tech and higher megapixels. This could lead to better photos, even in low light.
Battery and Charging Capabilities
The Samsung Galaxy S26 is also expected to have a bigger battery. It might charge faster too, thanks to new wireless charging tech. These changes will make the phone last longer and charge quicker.
Samsung S26 Models: What Variants to Expect
The Samsung Galaxy S26 series will have several models. This meets the needs of many consumers. It ranges from those on a budget to tech lovers wanting the newest tech.
Galaxy S26 Standard Edition
The Galaxy S26 Standard Edition will keep the classic S series look. It might have better display and processing power. It’s expected to have a 6.2-inch Dynamic AMOLED display for bright colors and smooth action.
Galaxy S26 Plus Features
The Galaxy S26 Plus will have a bigger 6.7-inch screen. It will also have better battery life and camera tech. It’s perfect for those who want a larger screen but still want great performance.
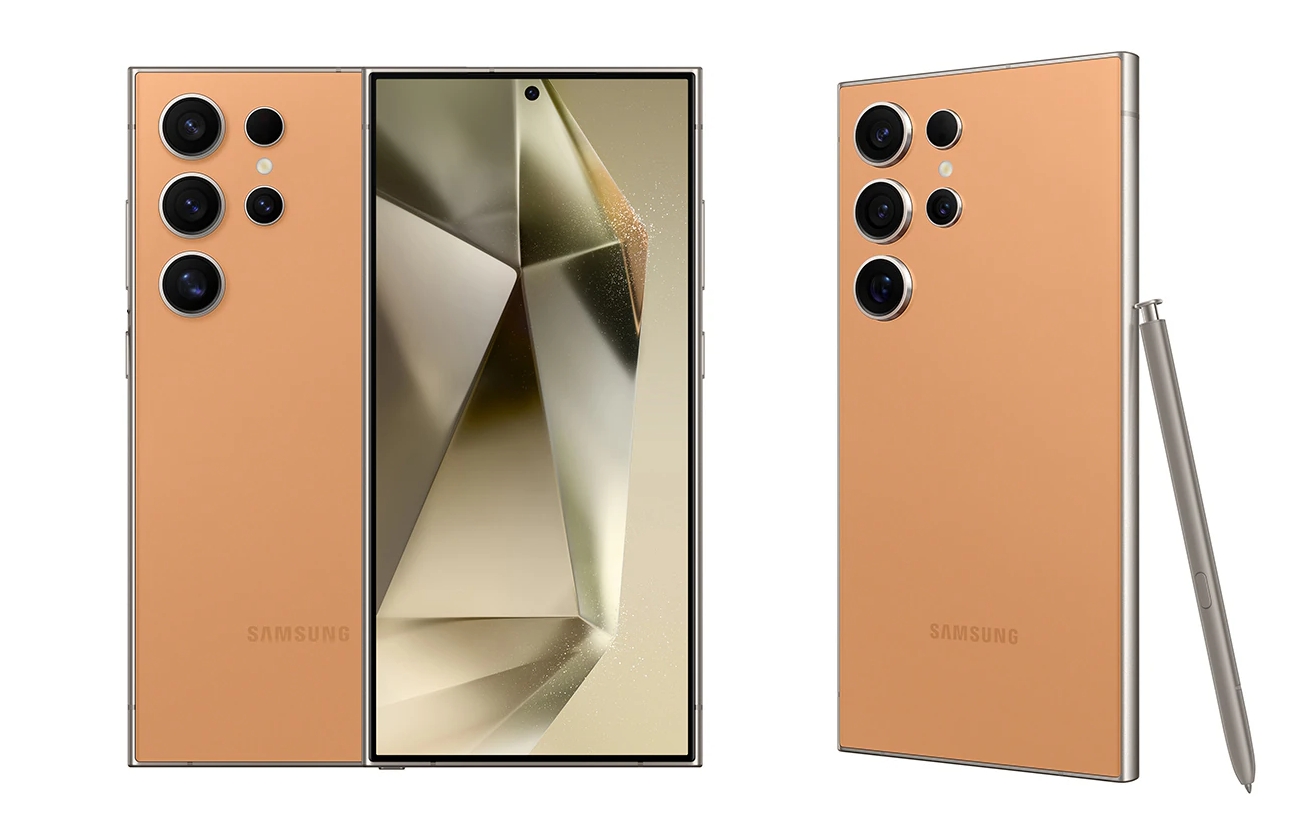
Galaxy S26 Ultra Specifications
The Galaxy S26 Ultra will be the top model. It will have a 6.8-inch screen, better zoom and low-light cameras, and the latest processor. It will also support fast charging.
How the Galaxy S26 Launch Affects Samsung’s Market Position
As the Samsung Galaxy S26 launch event gets closer, experts are looking at how it might change Samsung’s market share. The Galaxy S26’s launch is seen as a big deal in the tech world.
Competition with Apple and Google
The Samsung Galaxy S26 will compete with Apple and Google’s new devices. Samsung must come up with something new and special to stay on top.
Impact on Samsung’s Annual Sales Strategy
The Galaxy S26’s success will greatly affect Samsung’s sales plan for the year. A good launch could increase Samsung’s sales and keep its market spot.
The S26 launch is a key moment for Samsung. Its success will have big effects on the company’s market position.
Samsung S26 Launch Event: What to Expect
As the Samsung Galaxy S26 launch event gets closer, excitement is growing. Tech fans can’t wait to see the latest from Samsung. The Galaxy S26 series is expected to bring new features and innovations.
Potential Venues and Format
The event might happen at a big tech conference or Samsung’s own venue. It’s likely to be a mix of in-person and online, reaching more people.
Other Products Likely to be Announced
Samsung might also unveil new wearables, tablets, or accessories. These will likely work well with the Galaxy S26.
How to Watch the Event
Soon, Samsung will share how to watch the event. Usually, they stream it live on their website and YouTube. This lets fans from all over join in.
Pricing and Availability Predictions
With the Samsung Galaxy S26 coming soon, experts are guessing its price. People are excited to know how much it will cost and when they can buy it.
Expected Price Points for All Models
The Samsung Galaxy S26 series will have different models, like the standard, Plus, and Ultra. The base model might start at $800, while the Ultra could be over $1,500. The prices will match other top phones, with new camera and processor tech.
Global Release Strategy and US Availability
Samsung usually releases its Galaxy S series worldwide at the same time. The US will likely get the S26 first, as it’s a big market for Samsung. Pre-orders will probably start a week or two before it hits stores.
Carrier Deals and Promotions
Carrier deals and promotions are key for the Samsung Galaxy S26’s marketing. Big carriers will offer trade-in deals, data plan specials, and discounts for new customers. These offers will help sell more phones and keep Samsung ahead in the market.
Conclusion
As we look forward to the Samsung Galaxy S26 launch date, it’s clear this device will be a big deal. The latest news on the Galaxy S26 shows it will have better processors, camera tech, and battery life.
The Galaxy S26 will come in different models, like the Standard Edition, Plus, and Ultra. Each will have its own set of features and prices, meeting various user needs.
With the Galaxy S26 launch date near, the smartphone market will get even more competitive. Companies like Apple and Google will be watching closely. Samsung’s success with the S26 series will greatly affect their sales strategy.
Keeping up with the Samsung Galaxy S26 launch date and its features is key. It’s important for those who want to upgrade or check out new options in the market.
FAQ
When is the Samsung Galaxy S26 expected to be launched?
Samsung hasn’t said when the Galaxy S26 will come out. But, rumors and leaks point to early next year. It might be in February or March.
What are the expected key features of the Samsung Galaxy S26?
The Galaxy S26 is expected to have better processors and cameras. It will also have improved batteries and charging.
How many models of the Samsung Galaxy S26 are expected to be launched?
Samsung plans to release several Galaxy S26 models. These include the Galaxy S26 Standard, Galaxy S26 Plus, and Galaxy S26 Ultra. Each will have its own special features.
What is the expected price range for the Samsung Galaxy S26?
The exact prices are still a secret. But, it’s thought the Galaxy S26 will be priced well. The basic model might start at 0. The top model could be over
Will the Samsung Galaxy S26 be available globally, and when can I expect it in the US?
Samsung usually releases its top phones worldwide. The Galaxy S26 is expected to follow this. The US release date will be announced soon. Pre-orders might start a week or two before it comes out.
Are there any carrier deals or promotions expected for the Samsung Galaxy S26?
Carrier deals and promotions will be announced soon. Carriers often offer discounts, free storage, and bundle deals. Keep an eye on their websites and announcements.
How can I watch the Samsung Galaxy S26 launch event?
Samsung usually streams its launch events on its website and YouTube. You can also find coverage on big tech news sites and social media.
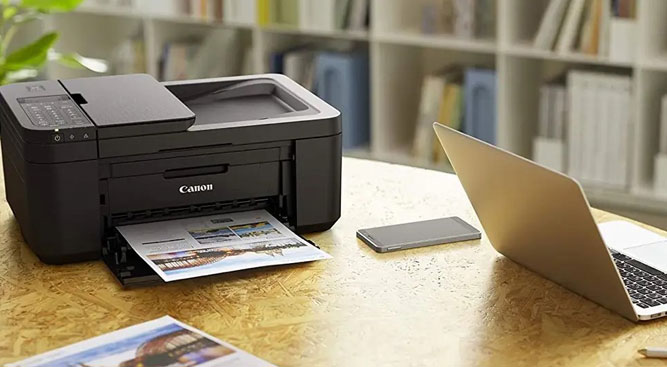
Downloading the user manual for Samsung S26 Ultra is key to getting the most out of your phone. It offers step-by-step guides on using your phone’s features. It also helps with common problems and boosts performance.
Having the user manual makes using the Samsung S26 Ultra much better. It helps you explore its advanced features and settings. This guide will show you how to download the manual, so you have all the info you need.
Key Takeaways
Understand the importance of downloading the Samsung S26 Ultra manual.
Learn how to access the manual for your device.
Discover how the manual can enhance your user experience.
Find out the steps to download the manual.
Get tips on navigating through the manual’s features.
The Importance of Having the User Manual for Samsung S26 Ultra
To get the most out of your Samsung S26 Ultra, you need the user manual. It’s a detailed guide that helps you understand the device’s advanced features. It also shows you how to fix common problems.
Key Features: It explains everything from basic to advanced functions. This ensures users get the most out of their device.
Benefits of Referencing the Manual for New Users
New users find many benefits in the Samsung S26 Ultra user manual. These include:
Quick Onboarding: It helps new users start using their device fast.
Enhanced Understanding: It gives deep insights into the device’s capabilities.
Troubleshooting: It helps solve common issues without needing support.
By using the Samsung S26 Ultra guide, users can greatly improve their experience with the device.
Official Samsung Sources for Downloading the S26 Ultra Manual
Samsung offers several official ways to download the S26 Ultra manual. This makes it easy for users to find the guides they need. You can pick the method that works best for you.
Samsung’s Official Website Navigation
To find the S26 Ultra manual on Samsung’s website, just follow these steps:
Visit Samsung’s official website.
Navigate to the Support section, usually found at the top or bottom of the homepage.
Use the search function to look for “S26 Ultra user manual.”
Finding the Support Section
The Support section is often labeled as “Support” or “Help.”
Searching for S26 Ultra Resources
Once in the Support section, enter “S26 Ultra user manual” or “S26 Ultra tutorial” in the search bar.
Using the Samsung Members App
The Samsung Members App is a great place to find the S26 Ultra user guide. Just download the app, log in, and find the resources or support section.
Samsung Support Pages and Knowledge Base
Samsung’s support pages and knowledge base are also great for the S26 Ultra manual. They have FAQs, troubleshooting guides, and detailed documentation.
Step-by-Step Guide to Download the User Manual for Samsung S26 Ultra
The Samsung S26 Ultra user manual is easy to get through different methods. You can choose the way that works best for you. This guide will show you three main ways to get the manual.
Method 1: Direct Download from Samsung.com
Getting the manual from Samsung’s official website is simple. First, you might need to make a Samsung account if you don’t have one.
Creating a Samsung Account (If Needed)
To make a Samsung account, go to Samsung’s website. Click on “Sign In” or “Register” and follow the steps to enter your information.
Locating and Downloading the PDF Version
After logging in, find the support section. Search for your device (Samsung S26 Ultra) and look for “Manuals & Downloads.” You’ll find the user manual in PDF format here.
Method 2: Using the Samsung Members App
The Samsung Members app is a great way to find your device’s user manual.
Installing and Setting Up the App
Get the Samsung Members app from the Google Play Store or Samsung Galaxy Store. Log in with your Samsung account or make one if you haven’t.
Accessing Manuals Through the App Interface
After setting up, go to “Support” or “My Devices” in the app. Choose your Samsung S26 Ultra and find the “User Manual” or “Manuals” option.
But, PDFs can be less interactive. You might have to search manually for what you need.
Interactive Online Manual Features
The online manual is more interactive. It has search functionality, hyperlinks, and multimedia content.
This format is great for finding information fast or watching tutorial videos.
In-Device Help Documentation
The S26 Ultra also has in-device help. It offers assistance right on your device.
This is super helpful for troubleshooting or learning about device features.
Alternative Sources for the Samsung S26 Ultra Manual
While Samsung’s official sources are the most reliable, there are other places to find the Samsung S26 Ultra manual. These alternatives are great if you can’t get to the official manual or want more resources. They help you understand your device better.
Trusted Third-Party Manual Repositories
Many reputable websites host user manuals for devices like the Samsung S26 Ultra. These sites have easy-to-use interfaces and the latest manual versions.
Online Communities and Forums
Online forums and communities for Samsung devices or Android phones are very helpful. Users share their experiences, tips, and manual links. This creates a space for solving problems and learning together.
Manual Sharing Platforms
Some platforms focus on sharing user manuals, including for smartphones like the Samsung S26 Ultra. They offer PDF downloads or online viewing. This makes it easy to find the information you need.
Source
Description
Reliability
Third-Party Repositories
Specialized websites hosting user manuals
High
Online Communities
Forums where users share experiences and resources
Variable
Manual Sharing Platforms
Platforms dedicated to sharing user manuals
High
Troubleshooting Manual Download Issues
Users might face problems when trying to download the Galaxy S26 Ultra user guide. But, these issues can be fixed easily. This section will cover common problems and their solutions for a smooth download.
Common Download Problems and Solutions
Several issues can stop the download of the Samsung S26 Ultra manual. Knowing these problems and their fixes can make the experience better.
Browser Compatibility Issues
Using the wrong browser can cause download errors. Make sure to use a supported browser like Google Chrome or Mozilla Firefox. Clearing your browser’s cache and cookies can also help.
File Corruption Fixes
A corrupted file won’t open right. Try downloading the manual again from the Samsung website. If problems continue, check your internet connection.
What to Do If the Manual Is Unavailable in Your Region
Sometimes, the Samsung S26 Ultra user guide might not be available in your area. Using a VPN to access it from a supported region could work. But, be aware of legal issues. Or, contact Samsung support for help.
Contacting Samsung Support for Manual Assistance
If you can’t download the manual, Samsung’s customer support can help. They can find other ways to get you the Samsung S26 Ultra tutorial. They can also guide you through specific steps for your device and area.
By using these troubleshooting tips, users should be able to download and use the Samsung S26 Ultra user guide. This will improve their experience with the device.
Making the Most of Your S26 Ultra Manual
The Samsung Galaxy S26 Ultra manual is more than a guide. It’s a key to unlocking your device’s full potential. To get the most out of it, you need to know how to use it well.
Navigating the Digital Manual Efficiently
Using the digital manual can greatly improve your experience. It’s designed to be easy to use, with a table of contents for quick access. You can also search for specific features or troubleshooting tips.
Using Search Functions to Find Specific Features
The search function in the manual is very helpful. Just type in what you’re looking for, and you’ll find the information fast. This is great for learning about advanced features or solving common problems.
Bookmarking Important Sections for Quick Reference
Bookmarking key sections can save a lot of time. Whether it’s how to use a feature or troubleshooting guides, having them ready makes things easier. You can quickly refer back to them when needed.
Understanding Technical Terminology and Icons
The manual uses technical terms and icons. Knowing what they mean is important for using your device well. You can find explanations for these at the start or end of the manual.
Term/Icon
Description
Wi-Fi
A technology that allows your device to connect to the internet or other devices wirelessly.
Bluetooth
A technology that enables your device to connect to other Bluetooth-enabled devices.
NFC
Near Field Communication, a technology that allows for close-range wireless connections, often used for payments or data transfer.
By understanding these parts of your Samsung S26 Ultra manual, you’ll use your device to its fullest. This will make your experience more satisfying and productive.
Conclusion
Understanding your Samsung S26 Ultra is key to getting the most out of it. The user manual is a detailed guide that covers everything from features to troubleshooting. It helps you learn how to use your device to its fullest.
The guide walks you through using the device’s interface and camera. It also shows how to customize settings to fit your needs. Whether you’re curious about AI features or need help with common problems, the manual is your go-to resource.
By following the manual’s instructions, you’ll make the most of your device. You can find the manual in PDF or interactive online formats. It’s easy to access, either by downloading from Samsung’s website or through your device.
Using the manual can greatly improve your experience with the Samsung S26 Ultra. It ensures you stay connected, productive, and entertained.
FAQ
Where can I find the user manual for Samsung S26 Ultra?
You can find the user manual for Samsung S26 Ultra on Samsung’s official website. You can also use the Samsung Members App or check your device settings.
What formats is the S26 Ultra user manual available in?
The S26 Ultra user manual is in PDF format. You can also find it as an interactive online manual and in-device help documentation.
How do I download the S26 Ultra manual from Samsung’s official website?
To download the manual, visit Samsung’s official website. Go to the support section and search for S26 Ultra resources. Then, find the manual to download.
Can I access the S26 Ultra manual through the Samsung Members App?
Yes, you can access the S26 Ultra manual through the Samsung Members App. First, install and set up the app. Then, go to the manuals section.
What should I do if the manual is unavailable in my region?
If the manual is not available in your region, contact Samsung support for help. You can also look for alternative sources like trusted third-party manual repositories.
How can I troubleshoot issues with downloading the S26 Ultra manual?
To fix download issues, check your browser’s compatibility. Also, fix any file corruption. If problems persist, contact Samsung support for help.
How do I navigate the digital S26 Ultra manual efficiently?
To navigate the digital manual well, use the search function to find what you need. Bookmark important sections. Also, understand technical terms and icons.
Are there alternative sources for obtaining the Samsung S26 Ultra manual?
Yes, you can find the manual on trusted third-party manual repositories, online communities, and manual sharing platforms. But, be careful of the reliability and accuracy of these sources.
What are the benefits of referencing the S26 Ultra user manual?
Referencing the S26 Ultra user manual can improve your experience. It provides detailed info on device features, settings, and troubleshooting. This helps you get the most from your device.
The highly anticipated smartphone is here, and we’re excited to explore its features. It promises top-notch performance and innovative technology. The S26 focuses on user experience with impressive specs. It has an advanced camera system and a powerful processor. We’ll dive into what makes the S26 special. Get ready to learn about Samsung Galaxy S26 key specs and features. This smartphone is set to change the game.
The Next Generation Samsung Flagship Unveiled
The Samsung Galaxy S26 has everyone excited. It promises advanced specs that are making waves. Early leaks and industry sources have given us a sneak peek at what’s new.
Early Leaks and Industry Sources
Recent leaks show big upgrades in the S26’s hardware and software. Experts say it will have a more powerful chipset, better cameras, and longer battery life.
What Makes the S26 Special
The Samsung Galaxy S26 brings a lot of new features. It will have advanced AI, a bigger and clearer display, and be more durable than before.
Samsung Galaxy S26 Key Specs: A Comprehensive Overview
The Samsung Galaxy S26 is set to be a top-notch device with advanced specs. It’s packed with new tech and cool features. This makes it a standout choice for tech lovers.
Hardware Specifications at a Glance
The Galaxy S26 will have a fast processor, lots of storage, and a sharp display. It will come in different memory sizes, possibly up to 16GB of RAM. This means it will handle tasks easily and run smoothly.
Software Innovations
The Samsung Galaxy S26 will run the latest Android version. Samsung’s special UI will give users a unique experience. It will also have smart AI for better camera shots and battery life.
This combination of hardware and software makes the Samsung Galaxy S26 a top smartphone. It promises a high-end experience for users.
Processor and Performance Details
The S26’s processor is a major highlight, offering substantial improvements over its predecessors. This upgrade is expected to provide a significant boost in overall performance and efficiency.
New Chipset Architecture
The Samsung Galaxy S26 features a new chipset architecture designed to optimize performance and power consumption. This latest chipset is built on a more advanced nanotechnology process. It allows for faster processing speeds and improved multitasking capabilities.
Benchmark Results and Performance Metrics
Early benchmark results indicate that the S26 outperforms its predecessors in various tasks, including gaming and multitasking. The device’s performance metrics show a significant improvement in CPU and GPU performance. This makes it an attractive option for demanding users.
Gaming and Multitasking Capabilities
The S26’s enhanced processor and optimized software enable seamless gaming and multitasking experiences. Users can expect smoother performance, faster app switching, and improved overall responsiveness.
The Samsung Galaxy S26’s performance details demonstrate its potential as a top-tier flagship device. It offers users a powerful and efficient mobile experience.
Display Technology and Design
The Galaxy S26’s display is a marvel of modern technology. It brings advancements that improve user experience. Samsung has focused on delivering exceptional visuals, making big improvements in the S26’s display technology.
Screen Size and Resolution
The Samsung Galaxy S26 has a larger screen size than its predecessors. This offers users a more immersive experience. The exact dimensions are yet to be confirmed, but leaks suggest a big increase in screen real estate.
Resolution is also expected to be higher. It might reach 4K standards. This ensures that visuals are crisp and detailed.
Refresh Rate and Brightness
The S26 is expected to have an improved refresh rate. It might exceed 120Hz, making animations and interactions smoother. The brightness levels are also expected to be enhanced.
This ensures the screen remains visible even in direct sunlight.
Design Changes and Materials
Samsung is expected to introduce new design elements and materials in the S26. It might use more durable and sustainable materials. The design changes are likely to enhance the premium feel of the device.
Overall, the Samsung Galaxy S26’s display technology and design are set to elevate the smartphone experience. They offer users a more engaging and immersive interaction with their device.
Camera System Upgrades
The Samsung Galaxy S26 has a new camera system. It makes taking photos better than ever. This upgrade adds new features that change how we take pictures with our phones.
Main Camera Specifications
The main camera of the Samsung Galaxy S26 has a 50MP sensor. It takes better photos in low light and captures more detail. This is a big step up from before, giving you sharper and more colorful photos.
Ultra-Wide and Telephoto Lenses
The S26 also has an ultra-wide lens with a 12MP sensor and a telephoto lens with a 10MP sensor. These lenses work with the main camera to give you a full photography experience. You can zoom up to 5x optically.
Video Recording Capabilities
The Galaxy S26 can record 8K video at 30fps. It also has better stabilization. This means you can take smooth, high-quality videos of important moments.
AI Photography Features
The S26’s camera uses advanced AI. It has scene detection, object tracking, and better portrait mode. These features adjust settings automatically for the best photos.
Camera Feature
Specification
Main Camera
50MP
Ultra-Wide Lens
12MP
Telephoto Lens
10MP, 5x Optical Zoom
Video Recording
8K at 30fps
Battery Life and Charging Capabilities
The Samsung Galaxy S26 shines in battery life and charging. Its battery is made for a full day of use, even for heavy users.
Capacity
The S26 has a bigger battery than before. This means longer use times without needing to recharge.
Fast Charging Technology
The S26 supports fast charging. This lets users quickly charge their battery when they’re in a rush. It’s great for those who need their device all day.
Wireless and Reverse Charging
The Galaxy S26 also has wireless and reverse wireless charging. Users can charge their device wirelessly and even charge other devices with their S26.
The Samsung Galaxy S26 is expected to arrive soon. Details about its release date and pricing are starting to emerge.
Expected Launch Timeline
Samsung plans to introduce the Galaxy S26 early next year. This follows their usual annual pattern.
Pricing Structure for Different Models
The Galaxy S26 will have various models with different prices and starting price is expected to be around $800.
US Carrier Support and Deals
Major US carriers are gearing up for the S26’s launch. They’re offering great pre-order deals and trade-in options.
Pre-order Bonuses
Those who pre-order the Galaxy S26 might get free accessories or Samsung service credits.
Trade-in Options
Customers can trade in their old phones for big discounts on the new S26. This makes upgrading easier on the wallet.
Conclusion: What to Expect from the Samsung Galaxy S26
The Samsung S26 is set to be a top-notch device. It boasts advanced galaxy s26 specifications. With a fast processor, top-notch camera, and stylish design, it will wow tech fans.
Its memory is another highlight. The samsung galaxy s26 memory will come in different sizes. This means users will have plenty of space for their files and apps.
Everyone is excited for the S26’s launch. Its advanced tech and cool design promise to shake up the smartphone world. The Samsung Galaxy S26 is ready to leave a mark.
FAQ
What are the key specs of the Samsung Galaxy S26?
The Samsung Galaxy S26 has a powerful processor. It also has up to 16GB of RAM and up to 1TB of storage.
What is the display size and resolution of the Samsung Galaxy S26?
It has a high-resolution display. The screen size is up to 6.8 inches. The resolution is up to 1440 x 3200 pixels.
What are the camera specifications of the Samsung Galaxy S26?
It has a quad-camera setup. The main camera is 50MP. It also has a 12MP front camera. It can record 8K video and has AI-powered camera features.
How long does the battery of the Samsung Galaxy S26 last?
Its battery lasts up to 5000mAh. It supports fast charging. This means you can use it all day on one charge.
What is the expected release date and pricing of the Samsung Galaxy S26?
It’s expected to launch soon. Prices start at around 0 for the base model. They vary based on model and storage.
Will the Samsung Galaxy S26 support 5G connectivity?
Yes, it supports 5G connectivity. This means faster data speeds and lower latency.
What operating system will the Samsung Galaxy S26 run on?
It will run on the latest Android version. Samsung’s custom UI will be on top.
Are there any additional features that the Samsung Galaxy S26 offers?
Yes, it has advanced biometric security. It’s also IP67 water resistant. It supports Samsung’s DeX mode.
So, you’re holding the new Samsung Galaxy S24 Ultra—the smartphone that’s redefining what’s possible. The official user manual is your ticket to getting the most out of your device. Best of all? You can grab the complete Samsung Galaxy S24 Ultra User Manual PDF absolutely free!
Why the User Manual Is Your Best Friend
The Galaxy S24 Ultra is packed with advanced tools: AI-powered cameras, the legendary S Pen, lightning-fast performance, and countless customization options.
Step-by-step setup: Insert your SIM card, launch your device, and transfer all your data with peace of mind.
Feature deep-dives: Learn about the S Pen, Smart Switch, camera modes, Multi Window multitasking, security settings, troubleshooting tips, and more.
Hidden gems: Uncover shortcuts, secret features, and ways to boost productivity or battery life.
How to Get the Samsung Galaxy S24 Ultra User Manual PDF for Free
1. Official Samsung Website
The most reliable place to download the user manual is directly from Samsung’s official support site. Here’s how US users can get it:
Go to the Samsung Support – Manuals & Software page.
Search for Galaxy S24 Ultra or input your device’s model number (like SM-S928U, which is commonly used in the US).
Click on the user manual (often listed under the “Manuals & Downloads” section), then download the PDF for free.
2. Directly download links from trusted third-party sites.
Several reputable sites offer the PDF in English and other languages at no cost. These versions match what Samsung provides and cover all US-specific features, including carrier options:
The manual is available as a 220-page PDF, chock full of illustrations and tutorials.
You can read it on your phone, tablet, or computer; all you need is a free PDF reader.
Some sites also offer step-by-step video tutorials for visual learners.
3. Access your phone directly
Don’t want to download? You can read the user guide right on your S24 Ultra:
Open Settings.
Scroll down and select either “User Manual,” “Tips & User Manual,” or similar. The precise name depends on the carrier/software version.
The manual will load in your web browser—super handy for on-the-go questions.
4. Helpful Extras from Carriers
Major US carriers like Verizon, AT&T, and T-Mobile also host S24 Ultra guides tailored to their network-specific features. Check your carrier’s support site if you need extra help with, for instance, activating your SIM or using Wi-Fi calling.
The Full Potential of Your Galaxy S24 Ultra
Your Samsung Galaxy S24 Ultra is more than just a phone—it’s a creative studio, productivity powerhouse, and entertainment hub wrapped into one.
Downloading the free user manual PDF ensures that every feature is at your fingertips, from the first swipe to advanced tricks only power users know.
Whether you’re a new Galaxy explorer or a Samsung veteran in the US, this guide is your shortcut to mastery.
So, don’t just use your phone—own your experience! Download the Galaxy S24 Ultra user manual PDF today, and take command of everything this remarkable device has to offer.
I’m excited to share the latest from Apple, the iPad Air 13. It’s packed with key features that promise top performance and productivity. Let’s dive into the Apple iPad Air 13 key specs. You’ll see what makes this tablet special. From its sleek design to its powerful internals, I’ll cover it all. This will help you decide if it’s the right choice for you.
The iPad Air 13 brings cutting-edge features and a user-friendly interface. It’s set to change the tablet world. Let’s explore what it offers.
What Makes the iPad Air 13 Special
The iPad Air 13 is Apple’s latest innovation. It has a premium aluminum body. This makes it look sleek and feel strong in your hand.
Design and Build Quality
The iPad Air 13’s design is both elegant and functional. It has a four-speaker audio system. Plus, Touch ID is integrated into the top button for a better user experience.
Feature
Description
Body Material
Premium Aluminum
Dimensions
9.8 x 6.4 x 0.24 inches
Display Technology and Features
The iPad Air 13 has a stunning Liquid Retina display. It offers vibrant colors and a smooth viewing experience. It’s great for watching movies or editing photos.
iPad Air 13 Key Specs and Performance
Apple’s latest iPad Air 13 has impressive specs. It’s made for top performance, perfect for work and fun.
Processor and Performance Benchmarks
The iPad Air 13 uses the A14 Bionic chip. This chip gives a big performance boost. It’s great for tasks like video editing and games.
Storage Options and RAM
The iPad Air 13 has different storage sizes, from 64GB to 1TB. This means you can store lots of files and apps. It also has up to 6GB of RAM for easy multitasking.
Storage
RAM
64GB
4GB
256GB
6GB
1TB
6GB
Battery Life and Charging Capabilities
The iPad Air 13 lasts all day, up to 10 hours on one charge. It also charges fast, so you can quickly top it up.
In short, the iPad Air 13 is a great choice. It’s powerful and efficient, perfect for anyone looking for a top-notch tablet.
Software Experience and Productivity Features
I was impressed by the iPad Air 13’s software features. It makes it a top choice for getting work done. It runs on the latest iPadOS, which boosts the user experience.
iPadOS Features and Optimizations
The iPad Air 13 has advanced multitasking thanks to iPadOS. This lets users work on many tasks at once. It also supports the Apple Pencil better, helping with creativity and productivity.
Camera System and Media Capabilities
The iPad Air 13’s camera system is a standout feature. It offers top-notch imaging and media capabilities. The device has a high-end camera setup for better video and image quality.
Feature
iPad Air 13
Previous Model
iPadOS Version
Latest
Previous Version
Camera Resolution
High
Medium
Apple Pencil Support
Yes
Yes
The iPad Air 13 is great for both work and creative tasks. Its iPadOS features and advanced camera system make it versatile.
My Final Verdict on the iPad Air13
The iPad Air 13 is a powerful device with an impressive display and fast performance. It has many features for work, entertainment, or education. After looking at iPad Air 13 key specs, I think it’s great for those who need a reliable tablet.
The iPad Air 13’s price is good, given its features and value. It’s not the cheapest, but its quality and performance make it worth it. The display and overall experience are top-notch.
In conclusion, the iPad Air 13 is a top choice for anyone wanting a quality tablet. Its specs, design, and ease of use make it perfect for demanding users.
Exploring the iPhone 17’s features shows how crucial a detailed user manual is. The iPhone 17 user guide is a key tool. It helps users grasp the device’s full potential and use its features effectively.
For those new to the iPhone 17, a user guide is very helpful. It offers clear instructions on using the device, solving common problems, and personalizing it. This makes the iPhone 17 easier to use and more enjoyable.
In this article, I’ll show you how to find and download the iPhone 17 manual PDF. This ensures you have all the tools needed to get the most out of your device.
Understanding the iPhone 17 User Guide
To get the most out of your iPhone 17, it’s important to know what the user guide covers. The iPhone 17 User Guide is made to help you understand your device’s features and how to use them.
What Information Does the Guide Contain?
The guide has step-by-step instructions for using your device. It covers setting it up, navigating, and fixing common issues.
Why You Should Download the Official Manual
Getting the official iPhone 17 User Guide is a smart move. It gives you the latest and most accurate info from the maker. It’s great for fixing problems and learning what your device can do. It’s a key tool for anyone wanting to learn more about their iPhone 17.
Where to Find the Official iPhone 17 User Guide PDF
You can find the iPhone 17 user manual in several ways. I’ll explain them below. The official guide has everything you need to know about your iPhone 17. It includes how to use it, troubleshooting tips, and more.
Apple Books App Method
One simple way to get the user manual is through the Apple Books App.
Searching Within the App
To find the guide, open the Apple Books App. Tap on the “Search” tab and type “iPhone 17 user manual.” The official manual should show up. You can then download it to your device.
Downloading for Offline Reading
After finding the iPhone 17 user manual in the Apple Books App, you can download it. This is great for reading in places with no internet.
Apple’s Official Support Website
You can also get the user manual from Apple’s Official Support Website. There’s a section for iPhone 17 support documents, including the user manual. Just visit the site, search for “iPhone 17 user manual,” and download the PDF.
Using the Tips App on Your iPhone
The Tips App on your iPhone is another place to find iPhone 17 tips. It doesn’t have the full user manual but offers useful tips. These tips can help you get the most out of your iPhone 17.
By using these methods, you can easily find the iPhone17 user manual and other resources. This ensures you understand your device’s features and capabilities fully.
Step-by-Step Download Instructions for iPhone 17 User Guide
Getting the iPhone17 User Guide is easy. You can do it on your iPhone or a computer. The guide is in PDF, making it easy to read on different devices.
Method 1: Direct Download on Your iPhone
Downloading the guide on your iPhone is handy. You’ll need to use Safari.
Using Safari Browser
Open Safari and go to Apple’s support website. Look for “iPhone 17 User Guide” and find the PDF. Tap the download link to save it on your iPhone.
Managing Downloaded Files
After downloading, manage the file with the Files app. You can view, share, or move it as you like.
Method 2: Computer Download Process
Downloading the guide on a computer is also easy. You can use a Windows or Mac computer.
Windows Computer Instructions
On a Windows computer, open your browser. Go to Apple’s support website and search for the guide. Download the PDF and save it on your computer.
Mac Computer Instructions
Mac users follow a similar process. Use Safari or another browser to find and download the guide from Apple’s website. The file will go to your Downloads folder by default.
Transferring the PDF to Your iPhone
After downloading on your computer, transfer the guide to your iPhone. You can use iTunes, email it to yourself, or use cloud services like iCloud or Dropbox.
Effectively Using the User Guide
To get the most out of your iPhone 17, it’s key to know how to use the user guide well. The guide covers everything from basic to advanced features.
Understanding the Guide’s Organization
The iPhone 17 user guide is easy to follow. It starts with the basics, like setting up your iPhone and navigating. Then, it moves on to more advanced topics, like customizing settings and using specific features.
Using Search Functions to Find Information
Using the search function in the guide is very efficient. It helps you find instructions or troubleshooting tips quickly. This makes it easier to use your iPhone.
Creating Bookmarks for Important Sections
Creating bookmarks for important sections is a great idea. It lets you go back to pages you need without searching. This makes following instructions or revisiting topics easier.
By following these tips, you can get the most out of the iPhone 17 user guide. You’ll enjoy a better user experience.
Alternative Resources for iPhone 17 Instructions
There are many ways to learn more about your iPhone 17, beyond the official user guide PDF. You can find a wealth of information online. This can help you get the most out of your device.
Official Apple Video Tutorials
Apple has a collection of video tutorials for your iPhone 17. These videos cover everything from setting up your device to using advanced features. They are a great addition to the user guide.
Watching these tutorials can help you understand your device better. You’ll also learn how to fix common problems.
Third-Party Guides and Community Support
There are also many third-party guides and forums for iPhone 17 users. These resources share tips and tricks not found in the official manual. They also let you connect with other users for support and advice.
Using these resources can improve your iPhone 17 skills. You’ll also stay updated with the latest tips and practices.
Troubleshooting Guide Access Problems
I’m here to help you fix common problems with the iPhone 17 User Guide. This guide is a valuable resource, but sometimes, accessing it can be tricky. You might face issues like trouble downloading or opening the PDF file.
PDF Download and Opening Issues
Having trouble downloading the guide? First, check your internet connection. Make sure you have enough space on your device. If the guide won’t open, try updating your PDF viewer or checking for iPhone software updates.
It’s possible the file is the problem. Try downloading the iPhone 17 manual again from Apple Support or Apple Books.
Compatibility Problems with Different Devices
The iPhone 17 User Guide works on many devices, but sometimes, it doesn’t. If you’re using a non-Apple device, make sure you have a compatible PDF viewer.
Having trouble on an iPhone or iPad? Try restarting your device or checking for updates. This might fix the problem and let you access the guide easily.
Now that you know how to find and download the iPhone Air User Guide, it’s time to dive in. The official iPhone 17 user manual is a key resource. It helps you get the most out of your device.
By following the steps in this article, you can easily find the iPhone 17 instructions. This lets you use your iPhone 17 to its fullest. Whether you want to learn new features or fix common problems, the user manual is here to help.
I suggest you download the guide and explore your iPhone 17’s features. With the official user manual, you’ll master your device. You’ll enjoy a smooth and easy user experience.
Running into a camera failure on your Samsung can be really annoying. It’s even worse when you’re trying to catch a special moment. I’ve been there and know how urgent it is to fix it fast. But don’t worry, there are easy fixes for this problem. In this article, I’ll show you how to troubleshoot the issue. You’ll get clear, step-by-step instructions to fix camera failed on Samsung.
Just follow these simple steps. You’ll be able to fix the camera error and start taking photos again without any hassle.
Understanding the “Camera Failed” Error on Samsung Devices
The “Camera Failed” error on Samsung devices can come from many issues. It’s important to find the root cause to fix it right.
Common Causes of Camera Failures
There are several reasons why Samsung cameras might fail. These include software bugs, hardware problems, or issues with the camera app. Sometimes, just restarting can solve the problem. But other times, you need to dig deeper.
How to Identify the Specific Issue
It’s key to tell apart software and hardware problems. Software issues might show up as app crashes or error messages. Hardware problems could mean physical damage to the camera lens or sensor.
Software vs. Hardware Problems
Software problems usually show up as app crashes or error messages. If the camera app freezes or won’t open, it’s likely a software issue. Hardware problems might show as physical damage or the camera not focusing right.
Error Messages and Their Meanings
Error messages can give clues about the problem. A “Camera Failed” message often means a software issue. But a message about hardware problems might mean you need repairs.
Knowing the difference between software and hardware problems is crucial. This way, you can fix the “Camera Failed” error on your Samsung device correctly.
Quick Fixes to Resolve Camera Failed on Samsung
Fixing a broken camera on your Samsung is simple. Many problems can be solved with basic steps. This makes it easy to get your camera working again.
Restart Your Samsung Device
One easy fix is to restart your Samsung. This can fix issues caused by bugs or glitches.
Force Close the Camera App
At times, the camera app might be causing trouble. Closing it can solve this problem.
Clear Camera App Cache
Step-by-Step Cache Clearing Process
Clearing the camera app cache can fix problems. To do this, go to Settings > Apps > Camera > Storage > Clear Cache.
Benefits of Regular Cache Maintenance
Clearing the cache regularly keeps your device running smoothly. It helps avoid camera issues.
Troubleshooting Step
Description
Benefit
Restart Device
Reboot your Samsung device
Resolves temporary glitches
Force Close Camera App
Close the camera app from the background
Stops app-related issues
Clear Cache
Remove corrupted data from the camera app
Prevents camera failure
How to Fix Camera Failed Samsung Through Basic Troubleshooting
Samsung camera problems can often be fixed with simple steps. When your camera fails, it’s really frustrating. But, there are a few guide you can try to fix it.
Boot into Safe Mode
Booting into safe mode is a good first step. It helps find out if a third-party app is causing the camera problem.
Entering Safe Mode on Different Samsung Models
How to enter safe mode can differ slightly by Samsung model. You usually need to press and hold the power button until you see the power options. Then, tap and hold “Power off” until you see “Reboot to safe mode.”
Testing Camera Functionality in Safe Mode
After entering safe mode, open the camera app. See if it works right. If it does, it means a third-party app might be the problem.
Model
Steps to Enter Safe Mode
Camera Functionality in Safe Mode
Samsung Galaxy S
Press and hold power button, tap and hold “Power off”
Functional
Samsung Galaxy Note
Press and hold power button, tap and hold “Power off”
Functional
Samsung Galaxy A
Press and hold power button, tap and hold “Power off”
Functional
Check for Software Updates
It’s important to keep your Samsung device updated. To check for updates, go to Settings > Software update > Download and install.
Reset App Preferences
Resetting app preferences can fix problems caused by wrong settings. To do this, go to Settings > Apps > ⋮ > Reset app preferences.
By trying these basic steps, you can often fix the “Camera Failed” issue on your Samsung device. If the problem still exists, you might need to do more troubleshooting.
Advanced Settings Adjustments for Camera Issues
Advanced settings can fix camera problems on Samsung devices. Restarting the device or app isn’t always enough. Sometimes, you need to dive deeper into the settings.
Modify Camera Settings
Start by tweaking the camera settings. Check the camera mode and make sure the resolution is right. Look at other settings that might be causing trouble. Adjusting these can fix the “Camera Failed” error.
Disable Battery Optimization for Camera
Battery optimization can block the camera app. Turn off this optimization for the camera app. Go to your device’s settings, find battery optimization, and add the camera app to the excluded list.
Check and Free Up Storage Space
Storage is key for camera work. A nearly full storage can make the camera fail.
How Storage Affects Camera Performance
Almost full storage means no room for new photos or videos. Having enough free space is vital.
Tools to Manage Storage on Samsung Devices
Samsung devices have tools for storage management. Use these to delete unwanted files and free up space. Regular cleaning helps avoid camera failures.
Resolving Hardware-Related Camera Problems
If your Samsung camera isn’t working, check for physical damage. Sometimes, the problem is with the device’s parts, not the software.
Inspect for Physical Damage
First, look for any damage on your Samsung device. Drops or impacts can harm the camera. Check the lens and around it for cracks or dents.
Clean the Camera Lens Properly
A dirty lens can ruin your photos and even stop the camera from working. Cleaning it is easy.
Safe Cleaning Methods
Use a soft, dry cloth to clean the lens. For tough smudges, dampen the cloth a bit with water. But, don’t let water get inside the device.
Products to Avoid
Don’t use harsh chemicals, rough materials, or compressed air. They can damage the lens or hurt the device’s inside parts.
Check for Case or Cover Interference
Also, check if your device’s case or cover is blocking the camera. If it is, it might be putting pressure on the camera module.
Software Solutions to Fix Samsung Camera Errors
For Samsung users with camera errors, software fixes can help. These fixes often involve adjusting software settings to get the camera working again.
Uninstall Camera Updates
Removing recent camera updates can fix the problem. This is because it goes back to an older version of the camera software. To do this, open the Google Play Store, find the Camera app, and choose “Uninstall updates.”
Reset Camera App to Factory Version
Resetting the Camera app to its original settings can also solve the issue. To do this, go to your device’s Settings, then Apps. Select the Camera app and choose “Reset to default settings.”
Third-Party Camera Apps as Alternatives
If the native Camera app still doesn’t work, try third-party apps. These apps might have better features and be more stable.
Recommended Alternative Camera Apps
Open Camera and Camera MX are good alternatives. They have advanced features and are available on the Google Play Store.
Setting Default Camera Applications
To make a third-party app your default camera, go to your device’s Settings. Then, Apps, and select “Default apps.” Pick the camera app you want to use by default.
When to Factory Reset or Seek Professional Help
For Samsung devices with camera problems, knowing when to reset or get help is key. If you’ve tried the steps from before and still have issues, it’s time for more solutions.
Performing a Factory Reset
A factory reset can fix software problems with your Samsung camera. But, make sure to back up your data first.
Backing Up Your Data First
Before you reset, back up important data like photos, contacts, and messages. Use Samsung’s Smart Switch or Google Backup for this.
Factory Reset Process
To reset, go to Settings > General Management > Reset > Factory data reset. Just follow the screen’s instructions to finish.
Step
Description
1
Go to Settings
2
Select General Management
3
Choose Reset
4
Select Factory data reset
Samsung Support Options
If resetting doesn’t work or you’re not sure how, Samsung has support. Visit their website or call customer service for help.
Warranty and Repair Information
If your Samsung is still under warranty, you might get free fixes or a new one. Check your warranty on the Samsung website or call support to see what you can get.
Keeping Your Samsung Camera Working Smoothly
To keep your Samsung camera working well, regular maintenance is key. Follow the troubleshooting steps in this article to fix common problems. This includes keeping your device’s software updated and cleaning the camera lens often.
Also, watch your storage space and avoid too much cache. These habits help keep your camera running smoothly. By doing these simple things, you can enjoy using your Samsung camera without issues. These tips offer a lasting solution to Samsung camera errors.
I recently got to test the Samsung Galaxy F56. It’s a phone that brings top features to a more affordable price. This could really change the game in the smartphone world. In this Galaxy F56 review, I’ll share my thoughts. Is the Samsung Galaxy F56 a good choice, given its price?
The Galaxy F56 has amazing specs. It has a fast processor and a top-notch camera. I was eager to see if it could meet its high expectations.
Design and Display Experience
The Samsung Galaxy F56 has a design that’s both stylish and comfortable. Its sleek look makes it a top choice for many.
Premium Build Quality and Ergonomics
The Galaxy F56 is built to last, feeling high-end in your hand. Its design fits well, making it great for long use.
AMOLED Display Performance
The device has a stunning AMOLED display. It shows vibrant colors and deep blacks. Even in bright sunlight, the Samsung F56’s display is clear, showing off its display capabilities.
Audio and Haptic Feedback
The Galaxy F56 excels in audio and haptic feedback. Its speakers play clear sound, and the haptic feedback is just right. This makes for a better user experience, highlighting the device’s key features.
Feature
Description
Rating
Build Quality
Premium feel and robust build
9/10
Display
Vibrant AMOLED display
9.5/10
Audio Feedback
Clear and immersive sound
8.5/10
Performance and User Experience
In this Samsung Galaxy F56 review, I’ll explore the F56’s performance and user experience. We’ll see how its technical specs play out in real life.
Processor Capabilities and Everyday Use
The Samsung Galaxy F56 has a powerful processor. It makes everyday tasks easy. Whether I’m doing multiple things at once, browsing, or watching videos, it works well.
One UI Software Features
One UI gives the phone a clean and easy-to-use interface. It has customization options and gesture controls. These features make using the device a breeze.
Battery Life and Charging Speed
The Galaxy F56’s battery lasts all day with regular use. Its fast charging makes topping it up quick.
Feature
Performance
Processor
Handles demanding tasks smoothly
One UI
Intuitive and feature-rich
Battery Life
Lasts a full day with moderate use
The Samsung Galaxy F56 is a great mix of performance and user experience. It’s a strong choice in its price range.
Samsung Galaxy F56 Review: Camera System Capabilities
In this Samsung Galaxy F56 review, I’ll dive into the Samsung F56’s camera system. We’ll see how it handles different situations. The camera is key in any smartphone, and we’ll check out the Galaxy F56’s features.
Main Camera Image Quality
The main camera on the Samsung Galaxy F56 takes stunning photos. It captures images with great detail and color. I was amazed by how well it worked in all kinds of light.
Ultra-Wide and Macro Photography
The Galaxy F56’s ultra-wide and macro lenses add to its photo-taking abilities. The ultra-wide lens lets you capture wider scenes. The macro lens, on the other hand, gives you sharp close-ups.
Camera Feature
Performance
Main Camera
Excellent image quality
Ultra-Wide Lens
Broader shots with minimal distortion
Macro Lens
Detailed close-ups
Video Recording and Stabilization
The Samsung Galaxy F56 shines in video recording too. It has smooth stabilization, which helps reduce camera shake. This is great for making videos on the move.
Is the Galaxy F56 Worth Your Money?
The Samsung Galaxy F56 is a great mix of top features at a lower price. It’s perfect for those who want high-end performance without spending too much. Its powerful processor and high-quality AMOLED display make it great for demanding users.
The Galaxy F56 also has excellent battery life. It can last a whole day on one charge. Its performance and price make it a top choice in the midrange market.
When thinking about buying the Galaxy F56, consider its good points and bad. It has a premium build, advanced camera, and smooth user experience. It’s a solid pick for anyone looking for a reliable and feature-packed phone.
I’m excited to help you explore the Samsung Galaxy S25 Edge. It can seem complex at first, but don’t worry. This guide will help you get the most out of it. The Samsung Galaxy S25 Edge is packed with cool features. In this Galaxy S25 Edge user manual, I’ll show you how to set it up and use its best features. You’ll learn how to customize your screen and use the camera like a pro.
Galaxy S25 Edge User Manual: Downloadable Resources
Having the right resources can make a big difference in using the Galaxy S25 Edge. There are several Galaxy S25 Edge user manual downloadable resources to help you get started.
Accessing the Full Digital Manual
You can download the full digital manual from Samsung’s official website. This guide covers everything from setting up your device to using its advanced features.
Samsung Members App Support
The Samsung Members app offers special support for Galaxy users. It has troubleshooting guides, tips, and exclusive content to improve your experience.
Video Tutorials and Learning Resources
Video tutorials are a great way to learn about your Samsung Galaxy S25 Edge. Samsung has many video guides. They cover everything from basic use to advanced techniques.
Community Forums and Expert Help
Joining the Samsung community forum is very helpful. There, you can meet other Galaxy S25 Edge users, ask questions, and get expert advice.
Getting to Know Your Samsung Galaxy S25 Edge
Learning about the Samsung Galaxy S25 Edge is the first step to enjoying it fully. As you start using your new device, you’ll want to know what’s in the box. You’ll also need to understand how to use its many features.
What’s in the Box
The Samsung Galaxy S25 Edge comes with useful accessories. You’ll find a USB-C charger, earbuds, and a quick start guide. It’s important to check the box to make sure everything is there.
Device Layout and Button Functions
Knowing how your Galaxy S25 Edge is laid out is key. It has physical buttons and ports, like a power button and volume controls.
Physical Buttons and Ports
The power button is on the right side, and the volume controls are on the left. You’ll find the USB-C port at the bottom and a SIM card tray too.
Touch Screen Gestures
The Galaxy S25 Edge responds to touch screen gestures like tapping, swiping, and pinching. Learning these gestures will make using your device better.
Display Features and Edge Screen Overview
The Galaxy S25 Edge has a great display with Edge screen features. The Edge screen gives you quick access to your favorite apps and contacts. It’s a great feature of the device.
First-Time Setup Process
Starting with your Samsung Galaxy S25 Edge is easy. You’ll go through a few steps to make it your own. These steps help you set up your device just right.
Inserting SIM Card and Memory Card
To begin, put your SIM and memory cards in their slots. Find the SIM card tray, usually on top or the side. Use the tool to open it. Place your SIM card in the tray correctly, then put the tray back in.
Powering On and Initial Configuration
With your cards in, press the power button to turn it on. You’ll see screens to pick your language, country, and Wi-Fi. You’ll also agree to terms and conditions.
Setting Up Your Samsung Account
Setting up a Samsung account is key. It lets you use cloud storage and track your device. To create your account, just follow the prompts on your device.
Transferring Data from Previous Device
Transferring data to your new Galaxy S25 Edge is easy. You can use:
Using Smart Switch
to move data from your old device. Or, if you have a cloud backup, you can restore it.
Smart Switch makes transferring contacts, photos, and more simple. Just connect your old device to your new one with a cable or wirelessly. Then, just follow the instructions on your screen.
If you’ve backed up your data to the cloud, you can restore it. Sign in with your Samsung account and pick the backup to restore.
Understanding the Galaxy S25 Edge User Interface
Exploring the Galaxy S25 Edge, I find a user interface that’s both rich and easy to use. It’s designed for an intuitive experience. This makes it simple to find and use different features and settings.
Navigating the Home Screen
The home screen is the heart of your Galaxy S25 Edge. Here, you’ll find your favorite apps, widgets, and shortcuts. To move around, just swipe left or right to switch screens.
Using the Edge Panel Features
The Edge panel is full of tools and info at your fingertips. To open it, swipe in from the right edge of the screen.
Customizing Edge Panels
You can tailor the Edge panels to fit your needs. Add or remove panels as you like.
Edge Panel Shortcuts
Edge panels let you create shortcuts to your top apps and functions. This makes your workflow smoother.
Notification Panel and Quick Settings
The notification panel gives you a quick look at your notifications. The quick settings menu lets you toggle settings like Wi-Fi and Bluetooth.
Gesture Controls and Navigation Options
The Galaxy S25 Edge has many gesture controls and navigation options. You can pick between traditional buttons or gestures to interact with your device.
Essential Settings and Customization
To get the most out of your Galaxy S25 Edge, explore its customization options. Personalizing your device can make it more intuitive and enjoyable to use.
Personalizing Your Home Screen
You can change your home screen’s layout, add widgets, and customize icon packs. To do this, long-press on an empty area of your home screen and select the desired option.
Setting Up Always-On Display
The Always-On Display feature shows essential information on your screen even when it’s locked. To set it up, go to Settings > Lock screen > Always-On Display, and choose your preferred style.
Customizing Edge Lighting and Notifications
Edge Lighting gives you a glimpse into notifications and important information. To customize it, navigate to Settings > Edge panels > Edge lighting, and adjust the settings according to your preferences.
Theme and Wallpaper Options
You can change your Galaxy S25 Edge’s theme and wallpaper to personalize it. To do this, go to Settings > Display > Theme, and choose from various options, including dynamic themes and custom icon packs.
Dynamic Themes
Dynamic Themes let you change your device’s look and feel based on your wallpaper. To access Dynamic Themes, go to Settings > Display > Theme > Dynamic Theme.
Custom Icon Packs
Custom Icon Packs let you change your apps’ appearance. To use Custom Icon Packs, navigate to Settings > Display > Icon pack, and select your preferred pack.
By following these steps, you can tailor your Galaxy S25 Edge to your preferences. This will enhance your overall user experience. For more detailed instructions, you can download the Galaxy S25 Edge user manual.
Mastering the Galaxy S25 Edge Camera System
Learning to use the Galaxy S25 Edge camera is simple. Its interface is easy to navigate, and it has many advanced features. You can quickly find and use different modes and settings.
Camera App Interface and Modes
The Galaxy S25 Edge camera app has many modes for different photography needs. You can easily switch between them using the mode selector.
Photo Modes Overview
The camera has several photo modes, like Single Take, Photo, and Pro. Single Take lets you take photos and videos with just one tap.
Video Recording Options
The camera app also has many video recording options. You can choose different resolutions and frame rates. Plus, features like Super Steady help reduce camera shake.
Pro Photography Tips and Tricks
To get the best from your Galaxy S25 Edge camera, try Pro mode. Here, you can adjust ISO and exposure compensation. Also, use advanced features like optical zoom and portrait mode for professional photos.
Advanced Camera Features
The Galaxy S25 Edge camera has many advanced features. These include AI tools and Night mode photography.
AI Enhancement Tools
The camera has AI tools that automatically adjust settings for better photos. These tools detect the scene and adjust settings for you.
Night Mode Photography
Night mode on the Galaxy S25 Edge lets you take bright photos in low light. The camera uses advanced algorithms to reduce noise and improve image quality.
Editing and Sharing Your Photos
After taking photos, you can edit them in the Gallery app or other apps. You can also share your photos directly from the camera app or Gallery app.
Connectivity and File Sharing
The Galaxy S25 Edge makes staying connected simple with its advanced features. This guide will help you set up Wi-Fi and Bluetooth. It also covers using Samsung DeX and sharing files.
Wi-Fi and Bluetooth Setup
To start with Wi-Fi and Bluetooth, go to Settings. Choose the options for Wi-Fi and Bluetooth. Wi-Fi connects you to nearby networks. Bluetooth lets you connect devices together.
Using Samsung DeX
Samsung DeX turns your Galaxy S25 Edge into a PC-like device. It works in two modes:
DeX on PC
DeX on PC gives you a bigger screen by linking your device to a computer.
Wireless DeX Mode
Wireless DeX Mode lets you use DeX without a PC. It boosts productivity on the move.
Quick Share and Nearby Share Features
The Galaxy S25 Edge has Quick Share and Nearby Share for easy file sharing. Just turn on these features in Settings to share files.
Cloud Storage and Syncing
Cloud storage is available through your Samsung account. It syncs data across devices. This keeps your files current and accessible everywhere.
Security Features and Privacy Protection
The Samsung Galaxy S25 Edge has top-notch security to keep your data safe. It’s key to know and use these features to protect your device and personal info.
Biometric Authentication Options
The Galaxy S25 Edge has fingerprint and facial recognition for unlocking. These methods are safe and easy to use.
Fingerprint Scanner Setup
To set up the fingerprint scanner, go to Settings, then Biometrics. Follow the steps to register your fingerprint. It’s fast and secure, making it a great way to unlock your device.
Facial Recognition Configuration
Facial recognition is another way to unlock your Galaxy S25 Edge. Go to Settings, then Biometrics, and choose Face recognition. Just follow the on-screen steps to set it up.
Secure Folder Setup
Secure Folder lets you keep sensitive files and apps safe. To start, go to Settings, then Biometrics and security, and pick Secure Folder. Then, follow the prompts to create a secure space for your sensitive content.
Private Share and Encrypted Communications
The Galaxy S25 Edge has Private Share for safe file sharing. Samsung also offers encrypted communication to keep your data safe while it’s being sent.
Find My Mobile and Anti-Theft Features
Samsung’s Find My Mobile lets you find, lock, or wipe your device if it’s lost or stolen. You need to register your device with your Samsung account to use this feature. It’s a vital tool for keeping your device and data safe.
Battery Management and Power Optimization
To get the most out of your Galaxy S25 Edge’s battery, you need to know how to manage it. Good battery management helps your device last longer and work better all day.
Understanding Battery Usage Patterns
It’s important to know how apps and features use your battery. The Galaxy S25 Edge shows you how different things affect your battery. This helps you find out which apps use the most power and change your habits.
Power Saving Modes
The Galaxy S25 Edge has special modes to save battery. These include:
Adaptive Power Saving
This mode learns how you use your phone and adjusts to save battery. It’s smart and helps your battery last longer.
Ultra Power Saving Mode
This mode cuts down on background data and slows down your phone. It’s great when you really need to save battery, like when it’s almost dead.
Fast Charging and Wireless Charging Options
The Galaxy S25 Edge can charge fast and wirelessly. This means you can quickly get your battery back up. Knowing how to use these features can save you a lot of time.
Extending Battery Lifespan
To make your Galaxy S25 Edge’s battery last longer, stay away from extreme temperatures. Also, keep your device updated and try not to let the battery get too low. Taking good care of your battery can make it last a lot longer.
Troubleshooting Common Issues
In this section, we’ll look at common problems Galaxy S25 Edge users might face. We’ll give step-by-step guides to fix them. Whether it’s slow performance, connectivity issues, or app crashes, we’ve got you covered.
Resolving Performance Slowdowns
If your Galaxy S25 Edge is slow, there are steps to make it faster. First, close apps you don’t need. You can do this by swiping away apps in the Recent Apps screen.
Also, try restarting your device or updating the software. This can help with performance.
Fixing Connectivity Problems
Connectivity issues can be annoying. But, there are ways to fix them. Let’s start with Wi-Fi problems.
Wi-Fi Connection Issues
To fix Wi-Fi issues, restart your router or forget the network and reconnect. Check your Wi-Fi settings to make sure you’re connected to the right network.
Bluetooth Pairing Problems
Having trouble pairing your Galaxy S25 Edge with Bluetooth? Try restarting both devices or unpairing and re-pairing. Make sure Bluetooth is on and devices are close.
Addressing App Crashes and Freezes
App crashes or freezes? Try closing and reopening the app. If it still happens, uninstall and reinstall the app or check for updates.
Factory Reset and Recovery Options
If nothing works, you might need to factory reset your Galaxy S25 Edge. This will reset it to its original settings. Before doing this, back up your important data, as it will be erased.
Getting the Most from Your Galaxy S25 Edge
To get the most out of your Galaxy S25 Edge, check out the advanced features in your Galaxy S25 Edge manual. The Edge Panel is a key feature. It gives you quick access to your favorite apps and contacts.
Customize the Edge Panel to fit your needs. Add shortcuts to your top apps and contacts for easy access. Also, use the device’s camera to capture life’s moments with precision, as explained in the camera section of this guide.
Understanding and using the device’s settings and features can improve your experience. This includes power-saving modes and security options. For detailed instructions, refer to your Galaxy S25 Edge user manual.
By following these tips and exploring the device’s capabilities, you can unlock the full potential of your Galaxy S25 Edge. Enjoy a seamless and efficient user experience.
Apple is likely to unveil the iPhone 17 series in September 2025. Let’s discuss the iPhone 17 release date, probable new features, and why this launch is one of Apple’s most exciting yet.
The announcement is expected to take place in the second week of September, likely between September 8 and 10. Pre-orders are anticipated to begin on Friday, September 12, with general availability projected for around September 19, 2025.
iPhone 17 Release Date: When Can You Get Yours?
Based on Apple’s well-established release pattern, the iPhone 17 is expected to debut in mid-September 2025, with pre-orders likely starting a week before the official launch. The company typically holds its fall event in early September, where it unveils the latest iPhone 16 models, followed by a release date around the third Friday of the month.
Here’s a quick timeline based on past trends:
Announcement: Early September 2025 (likely September 9 or 16)
Pre-orders: September 12 or 19, 2025
Official Release: September 19 or 26, 2025
Of course, unexpected delays (like supply chain issues) could shift these dates, but Apple has been consistent with its September launches for years.
What to Expect from the iPhone 17
While Apple keeps details under wraps until launch day, leaks and industry trends give us some clues. Here’s what might be in store:
1. Design & Display
Thinner Bezels & New Form Factor: Rumors suggest a sleeker design with an even more edge-to-edge display.
ProMotion for All Models? Currently, only Pro iPhones have 120Hz refresh rates—this could extend to the base model.
Possible New Colors: Apple loves refreshing its color options—maybe a new “Titanium” finish for standard models?
2. Performance & Chip
A19 Bionic Chip: Expect faster speeds, better AI capabilities, and improved efficiency.
Enhanced Cooling System: Gamers and power users might see better thermal management.
3. Camera Upgrades
Periscope Zoom for Non-Pro Models? The iPhone 16 Pro may be the first model to receive this feature, while the iPhone 17 could further enhance it.
Better Low-Light Performance: Apple continues to refine night mode and computational photography.
4. Software & AI Features
iOS 26: The iPhone 17 will likely debut with Apple’s latest OS, packed with AI-driven enhancements.
Smarter Siri: Deeper integration with on-device AI for quicker, more personalized responses.
There might be a slight price increase compared to previous models, partly due to rising component costs and tariffs. However, Apple plans to justify this with notable design and feature upgrades.
Should You Wait for the iPhone 17?
If you’re due for an upgrade, here’s the big question: Should you hold out for the iPhone 17?
✅ Wait if…
You want the latest chip, camera upgrades, and potential design overhaul.
You’re happy with your current phone and can hold off until late 2025.
❌ Buy Now (iPhone 16) if…
You need a new phone immediately and don’t want to wait another year.
The rumored iPhone 17 features don’t seem like a must-have for you.
Final Thoughts: The iPhone 17 Could Be a Game-Changer
The iPhone 17 is shaping up to be one of Apple’s most exciting releases yet. With faster performance, better cameras, and possibly a sleek new design, it could set a new standard for smartphones.
While we’ll have to wait for official confirmation from Apple, one thing is certain: the iPhone 17 will be worth the hype. Stay tuned for more leaks and updates as we get closer to September 2025!
Are you planning to upgrade to the iPhone 17, or will you stick with your current model? Let us know in the comments!
When I opened my new phone, I knew making it easy to use was key. This Motorola Razr 60 Ultra user guide will show you how to set up and use your device. I’ll share my first thoughts, tips, and tricks to make your experience great. I aim to make you feel at ease and confident with your new phone.
By making setup simple and exploring features, you’ll enjoy your phone more. Let’s start and see how to get the best from your Motorola Razr 60 Ultra.
Getting Started with the Motorola Razr60 Ultra
When I opened the box, I was amazed by the Motorola Razr 60 Ultra’s design and ease of use. It comes with a detailed manual. This makes setting it up simple.
My Unboxing Experience and Setup Process
The unboxing was impressive, with everything neatly arranged. The manual gave clear steps for setting up. This made it easy to start using the device.
What’s Included and First Impressions
The box had the Motorola Razr 60 Ultra, a charger, and a quick start guide. My first thought was that it looked both stylish and durable.
Account Setup and Data Transfer Tips
Setting up my account and moving data from my old phone was easy. The razr 60 ultra setup instructions were clear and helpful.
Mastering the Dual-Screen Experience
The Motorola Razr 60 Ultra has a unique dual-screen design. It offers a lot of flexibility. Learning to use it took some time, but it was worth it.
Main Display Features and Gestures
The main screen is easy to use, with gestures that make navigating simple. I quickly learned to swipe and tap to access apps and menus.
Maximizing the Cover Screen Functionality
The cover screen is more than just a quick peek. It’s a full interface for controlling features and checking notifications without opening the phone.
Comprehensive Motorola Razr 60 Ultra User Guide
Exploring the Motorola Razr 60 Ultra, I found many features that make my phone use better. It’s more than a phone; it’s a tool to make life easier.
Essential Features I Use Daily
The Motorola Razr 60 Ultra has features I use every day. Its camera system stands out.
Camera System: Pro Mode and FlexView Photography
The camera system offers high-quality photos with Pro Mode and FlexView. Pro Mode lets me adjust settings for the perfect shot.
Battery Optimization and Fast Charging Strategies
The device’s battery optimization and fast charging are great. They keep my phone ready when I need it.
Troubleshooting Issues I’ve Encountered
Like any device, the Motorola Razr 60 Ultra faces issues. But, solving common problems is easy.
Software Updates and Performance Solutions
Keeping the software updated is key for performance. Updates often fix known problems, making my experience smoother.
Hinge Care and Screen Protection Tips
I’ve learned to care for the hinge and protect the screen. Following the manufacturer’s advice helps my device last longer.
Conclusion: My Overall Experience with the Razr 60 Ultra
My time with the Motorola Razr 60 Ultra has been great. I’m eager to share what I’ve learned. You now know how to get the most out of this phone.
I’ve found many useful tips and tricks for the Razr 60 Ultra. These will make your phone use easier and more fun. This guide will help you enjoy all the phone has to offer.
Whether you’re new to smartphones or already know them, these tips will help. You’ll unlock your phone’s full potential and enjoy its features more.
Find out how to make the most of your new smartphone with our detailed guide. The latest Pixel series has exciting features that boost your mobile experience. This Google Pixel 9a user guide will show you the best features of your device. We’ll cover everything from camera settings to battery life. You’ll learn how to use each feature to its fullest.
Looking for tips on settings or the latest tech? Our guide is here to help. It will make using your device easy and fun.
Getting Started with Your Google Pixel 9a
Setting up your Google Pixel 9a is the first step to unlock its full potential. The initial setup is easy and involves a few key steps.
Activating Your SIM and Google Account
To start using your Google Pixel 9a, activate your SIM card and Google account. Insert your SIM card into the tray, and follow the on-screen instructions. Then, sign in to your Google account or create a new one if needed.
After activating your SIM and Google account, you’ll need to set up some basic settings. This includes choosing your language, setting up Wi-Fi, and selecting location services preferences. Make sure to review these settings carefully for a smooth experience.
You can also customize your home screen, notification preferences, and other features to fit your needs. By following these steps, you’ll enjoy all the features of your Google Pixel 9a.
Google Pixel 9a User Guide: Essential Features
Discover the key features of the Google Pixel 9a. It offers a top-notch smartphone experience. You’ll find advanced camera tech, easy voice commands, and strong security.
Using Night Sight and Portrait Mode
The Google Pixel 9a’s camera is a highlight. It has Night Sight and Portrait Mode for amazing photos in any light. Night Sight brightens up dark scenes, while Portrait Mode blurs the background.
To use Night Sight, open the camera app and choose Night Sight mode. For Portrait Mode, pick the Portrait Mode option and adjust the blur.
Google’s AI photo editing tools make enhancing photos simple. You can use Auto Awesome and Portrait Light to improve your photos.
To access these tools, open Google Photos, pick a photo, and tap “Edit.” Then, explore the editing options.
Voice Commands and Shortcuts
The Google Pixel 9a supports voice commands and shortcuts. It’s easy to do tasks quickly. You can send messages and make calls with the Google Assistant.
To set up voice commands, go to settings, then “Apps & notifications,” and “Advanced” to choose your commands.
Using Assistant to Control Your Device
The Google Assistant is a big part of the Pixel 9a. It lets you control your device with voice commands. You can navigate, play music, and more.
To use the Google Assistant, long-press the home button or say “Hey Google” to start it.
Setting Up Face Unlock and Fingerprint Scanner
The Google Pixel 9a has Face Unlock and a Fingerprint Scanner for security. To set up Face Unlock, go to settings, then “Security,” and “Face Unlock” to register your face.
For the Fingerprint Scanner, go to “Security” and “Fingerprint” to add your fingerprint.
Using the Titan M2 Security Chip
The Titan M2 Security Chip adds extra security to your Google Pixel 9a. It keeps your data safe from threats.
The Titan M2 chip makes sure your phone’s boot process is secure. It also encrypts your data.
Power User Tips for the Pixel 9a
Get the most out of your Google Pixel 9a with these expert tips. As a power user, you can make your device work better and look just right for you.
Personalizing Material You Design
Material You lets you change how your Pixel 9a looks and feels. To change it, go to display settings and pick a wallpaper that you like. The system will then change colors to match your wallpaper, making everything look great together.
Routines and automation can make your day easier and more productive. With your Pixel 9a, you can set up routines like turning off your phone during meetings or turning on Wi-Fi when you get home.
To set up routines, go to Google Assistant settings and choose “Routines.” Here, you can make your own routines based on what you do every day. This makes your device smarter and easier to use.
Using these power user tips can help you fix common problems and enjoy your Pixel 9a more. Whether it’s making your device look just right or automating tasks, these features will help you get the best from your Pixel 9a.
Solving Common Issues on Your Google Pixel 9a
Having problems with your Google Pixel 9a can be really annoying. But, many common issues have easy fixes. Start by checking for software updates. These updates often solve known problems.
If your battery is draining fast, try optimizing your battery settings. Also, close any apps you’re not using. For connectivity issues, try restarting your device or turning airplane mode on and off.
For more complex problems, the Google Pixel support website has detailed guides. The Google Pixel 9a support team is also ready to help with any questions or concerns. By using these troubleshooting tips and support resources, you can fix common issues fast. This way, you can keep enjoying your Google Pixel 9a.
FAQ
Q: How do I set up my Google Pixel 9a for the first time?
A: To start, activate your SIM card and Google account. Then, follow the on-screen steps to set up basic settings like language and Wi-Fi. The Getting Started section of this guide has a detailed walkthrough.
Q: What are the best camera features on the Google Pixel 9a?
A: The Google Pixel 9a has amazing camera features. Night Sight takes great photos in low light, and Portrait Mode gives you professional-looking shots with a blurred background. For more on these, check the Essential Features section.
Q: How do I personalize my Google Pixel 9a’s look and feel?
A: You can customize your Google Pixel 9a with Material You design. This lets you change the color scheme and layout to your liking. For more details, see the Power User Tips section.
Q: What should I do if I encounter issues with my Google Pixel 9a?
A: If you run into problems, check the Solving Common Issues section of this guide. You can also find help at Google’s support resources.
Q: How do I use voice commands on my Google Pixel 9a?
A: To use voice commands, say “Hey Google” or press and hold the home button to activate Google Assistant. Then, give voice commands to do tasks, send messages, or make calls. For more, see the Essential Features section.
Q: How do I set up Face Unlock and Fingerprint Scanner on my Google Pixel 9a?
A: To set up Face Unlock and Fingerprint Scanner, go to Settings, then “Security”. Follow the prompts to register your face or fingerprint. For step-by-step instructions, refer to the Essential Features section.
Q: What is the Titan M2 Security Chip, and how does it enhance my Google Pixel 9a’s security?
A: The Titan M2 Security Chip adds extra protection to your Google Pixel 9a. It secures your device’s boot process, protects sensitive data, and prevents unauthorized access. For more, see the Essential Features section.
Capturing what’s on your screen can be very useful. It’s great for saving a memorable chat, documenting a bug, or sharing cool stuff with friends. If you have a Samsung S25 Edge, I’ll show you how to take screenshot on Samsung S25 Edge easily.
Screen capture is a handy feature for many situations. In this guide, I’ll explain how to take a screenshot step by step. By the end of this guide, you’ll know how to capture your screen easily. I’ll also cover the different ways to do it.
Basic Methods to Take Screenshot on Samsung S25 Edge
The Samsung S25 Edge makes it easy to capture and share content. It offers several intuitive ways to take a screenshot.
Using Hardware Button Combination
To take a screenshot, press the Power and Volume Down buttons together. Hold them for a few seconds. You’ll see a flash and hear a camera shutter sound when it’s done.
If you’re having trouble, check if the buttons are working right. Make sure they’re not stuck or damaged. Sometimes, a simple restart can fix the problem.
Also, make sure the screenshot feature isn’t turned off in your settings. This is rare, though.
Using Palm Swipe Gesture
For a gesture-based method, swipe your palm across the screen from right to left. This is convenient and can be set up in your device settings.
Enabling Palm Swipe Feature
To use the palm swipe gesture, go to Settings, then Advanced Features, and Motions and Gestures. Turn on the “Palm swipe to capture” option there.
With it enabled, you can capture your screen with a simple swipe.
Advanced Screenshot Features and Options
The Samsung S25 Edge has cool screenshot features. They make taking and editing pictures easier.
Capturing Scrolling Screenshots
One great feature is capturing scrolling screenshots. This is perfect for saving long web pages or documents.
To take a scrolling screenshot, start by taking a regular screenshot. Then, tap “Capture more” to scroll and capture more content.
Using Smart Select for Partial Screenshots
Smart Select lets you capture just a part of your screen. It gives you control over what you save or share.
To use Smart Select, go to the screenshot preview. Tap “Smart Select” and pick a shape to select the area you want. It’s great for focusing on details in a big image or document.
Screenshot Editing Tools and Options
After taking a screenshot, you can edit it with built-in tools. These tools help make your screenshot better.
You can crop, draw, or add text to your screenshot. This lets you customize it as you like.
Quick Sharing Your Screenshots
Sharing your screenshots is easy. Just tap the share icon in the screenshot preview and choose how you want to share it.
You can share via messaging apps, email, or social media. It’s simple to share with others or save for later.
We’ve looked at many ways to take screenshot on Galaxy S25 Edge. You now know how to easily capture and share content. From simple button presses to advanced features like scrolling screenshots, there’s a lot you can do.
Knowing how to use these features can really improve your phone use. Whether you want to save info, share something, or just capture a moment, you have the tools you need. Try out these features and see how they fit your needs. With the Samsung S25 Edge, taking and sharing screenshots is easier than ever.
Welcome to your comprehensive resource for maximizing your smartphone experience with the Samsung Galaxy A56. This guide will help you set up your device, explore its features, and customize it to your liking. In this Samsung A56 user guide, we’ll dive into what your new smartphone can do.
Whether you’re new to smartphones or want to discover more, we’ve got you covered. Follow our step-by-step instructions and you’ll be using your device like a pro soon. Let’s start and unlock all the Samsung A56 has to offer.
Getting Started with Your Samsung A56
Your Samsung A56 is more than a phone; it’s a doorway to new adventures. To start enjoying it, follow this guide.
Initial Setup and Configuration
Setting up your Samsung A56 is the first step to fun. It involves a few important steps to get you started.
SIM Card Installation and Activation
Start by putting in your SIM card. Find the SIM card tray, put in the card, and push it in until it clicks. Then, follow the screen to activate your SIM card and get online.
Google Account and Samsung Account Setup
Next, set up your Google and Samsung accounts. This is key for using the Google Play Store, syncing data, and Samsung services like Cloud and Pay.
Navigating the User Interface
Learning to use your Samsung A56 is crucial for a smooth experience. It has an easy-to-use interface to help you find what you need quickly.
Understanding the Home Screen and App Drawer
The home screen shows widgets, shortcuts, and folders. The app drawer lets you open all your apps with a tap.
Using Gestures and Navigation Controls
Your Samsung A56 uses gestures and controls for easy app switching and navigation. Get to know these to move between apps and screens smoothly.
Essential Settings to Configure First
To make your Samsung A56 your own, set up some key settings. This makes your device fit your style.
Display and Sound Preferences
Change display settings like brightness and resolution to your taste. Also, adjust sound settings for ringtones, notifications, and volume.
Connectivity Options (Wi-Fi, Bluetooth, NFC)
Turn on Wi-Fi, Bluetooth, and NFC as you need them. These options help you get online, connect devices, and use Samsung Pay.
Samsung A56 User Guide: Features and Customization
Discover the full potential of your Samsung A56. It has advanced features and customization options. You can make your device fit your lifestyle and preferences perfectly.
Camera Tips and Photography Features
The Samsung A56 has an advanced camera system. It offers many photography features to improve your mobile photos. Knowing the camera’s capabilities is important for mobile photography.
Pro Mode and Special Shooting Modes
Use Pro Mode to adjust settings like ISO and focus. Try special modes like Live Focus and Super Steady for unique shots.
Video Recording and Editing Tools
The Samsung A56 is great for video recording. It has 8K resolution and advanced stabilization. You can edit your videos directly on your device with built-in tools.
Personalizing Your Home Screen
Personalization is key on the Samsung A56. Customize your home screen to show your personality. Make your device truly yours.
Themes, Wallpapers, and Icon Packs
Change your interface with themes, wallpapers, and icon packs from the Galaxy Store.
Widgets and Edge Panels
Add widgets for quick info and Edge panels for app access. Enhance your home screen.
Battery Optimization Techniques
To make your Samsung A56 last all day, use battery optimization. Adjust your usage and settings for better battery life.
Power Saving Modes
Turn on power saving modes. They limit data usage, reduce brightness, and turn off features.
Background App Management
Control which apps run in the background. This saves battery and improves performance.
Security Features and Privacy Settings
Protect your data with the Samsung A56’s security features and privacy settings. Keep your information safe.
Biometric Authentication Options
Use fingerprint, facial recognition, or iris scanning for secure biometric authentication.
Secure Folder and Privacy Controls
Store sensitive files and apps in the Secure Folder. Adjust privacy controls to manage data sharing and permissions.
By exploring and using these features and customization options, you can enhance your Samsung A56 experience. Make it more personalized, efficient, and secure. You’re now well on your way to mastering your Samsung A56.
You’ve learned about setting it up, its features, and how to customize it. The Galaxy A56 manual guide has given you key tips and tricks to make your phone better. As you keep exploring, you’ll find even more ways to make your Samsung A56 your own. If you need help or want to learn about a feature, just refer back to this guide.
Now that your device is optimized, you can enjoy a smooth and safe experience. Keep your phone updated with the latest software. Also, explore new features to get the most out of your Samsung A56.
Web browsing can sometimes feel slow, and Chrome might be the culprit. Turning off hardware acceleration in Chrome could be the answer. Modern browsers use GPU acceleration for better graphics, but it’s not always good for everyone.
Chrome’s hardware acceleration can lead to problems like visual issues and slow systems. Disabling GPU acceleration in Chrome can make browsing smoother. If you’re having trouble with your browser, tweaking these settings might help.
This guide will show you how to manage your browser’s performance. You’ll learn why and when to optimize your Chrome settings. Whether you’re just browsing or need a reliable browser, knowing about hardware acceleration is key.
By the end of this article, you’ll know a lot about Chrome’s hardware acceleration. You’ll be able to make smart choices to improve your browser’s performance.
Understanding Hardware Acceleration in Chrome and Its Impact
Google Chrome uses hardware acceleration to make browsing faster and better. It uses your computer’s graphics card to handle complex tasks. This is more efficient than old software methods.
Chrome’s hardware acceleration moves graphic tasks from the CPU to the graphics card. This makes browsing quicker, with better performance on videos, animations, and complex sites.
How Hardware Acceleration Functions
Hardware acceleration in Chrome spreads out work among different parts of your computer. The graphics card is much faster at graphics tasks than the CPU. This leads to smoother browsing.
Faster video rendering
Improved webpage loading
Reduced CPU strain
Enhanced multimedia performance
Common Performance Issues with GPU Acceleration
Even with its benefits, you might need to turn off hardware acceleration. Some users face graphic issues, high system usage, or problems with web apps.
Signs Your Browser Needs Hardware Acceleration Disabled
Chrome’s hardware acceleration problems can show in different ways. Look out for these signs that might mean you need to change your settings:
Chrome’s hardware acceleration can sometimes cause performance issues for users. If you’re experiencing chrome hardware acceleration performance problems, disabling this feature might help improve your browsing experience.
Follow these simple steps to disable hardware acceleration and potentially reduce chrome hardware acceleration lag:
Open Google Chrome browser
Click the three-dot menu in the top right corner
Navigate to Settings
Scroll down and click on “Advanced”
Find the “System” section
Toggle off “Use hardware acceleration when available”
Restart Chrome to apply changes
When you disable hardware acceleration, Chrome switches from using your GPU to processing graphics through your CPU. This can help resolve hardware acceleration chrome lag that some users experience with certain graphics configurations.
Pro tip: After making changes, restart your browser completely. Close all Chrome windows and reopen to ensure the new settings take effect. If you notice any negative performance impacts, you can easily re-enable hardware acceleration by following the same steps.
Check browser performance after disabling
Monitor system resource usage
Revert settings if needed
Remember that hardware acceleration settings can vary depending on your specific computer hardware and graphics card. What works for one user might not work identically for another.
Common Hardware Acceleration Problems and Solutions
Chrome’s hardware acceleration can sometimes cause unexpected problems. It’s meant to make your browser faster, but it can sometimes not work right. Knowing about these issues helps you make better choices about your browser settings.
Graphics Glitches and Visual Artifacts
Chrome hardware acceleration can lead to visual problems. You might see:
Screen tearing during video playback
Random color distortions
Flickering windows or web pages
These issues usually come from outdated graphics card drivers. Updating your drivers often fixes these problems.
Browser Crashes and Freezes
Browser crashes and freezes can also happen. They might be caused by:
Incompatible graphics card drivers
Outdated Chrome browser version
Conflicts with system graphics settings
High CPU Usage Issues
Hardware acceleration can sometimes make your CPU work harder. If your browser uses too much CPU, check your graphics settings. Running diagnostic checks can also help find performance issues.
Benefits and Drawbacks of Disabling Hardware Acceleration
Disabling chrome hardware acceleration can have mixed results for your browser. Some people see big improvements, while others face problems with graphics and browsing.
Turning off hardware acceleration has some advantages:
It can reduce CPU and GPU use.
It might lower system resource use.
It can help older computers run better.
It can fix some graphics-related browser issues.
But, there are also downsides to consider. Without hardware acceleration, Chrome’s graphics might not perform as well. You might see:
Before making changes, test your browser’s performance. This helps you decide based on your specific needs.
Conclusion
Managing hardware acceleration in Google Chrome can really boost your browser’s speed. It’s all about how your computer’s graphics and browser settings work together. This can make your browsing smoother and more stable.
Turning off hardware acceleration is a custom fix, not a one-size-fits-all solution. Since every computer is different, trying out different settings is crucial. If Chrome still doesn’t run well, you might want to try a different browser like Mozilla Firefox or Microsoft Edge.
Web browsing should be easy and fast. If your browser isn’t performing well, it’s time to tweak its settings. Finding the right tech solution is all about what works best for your system and how you use it.
As tech gets better, so does browser performance. Keep up with updates and make sure your Chrome browser is current. Being proactive in managing your browsing environment is key to a better online experience.
Keeping your tires at the right pressure is key for safety and performance. The Tire Pressure Monitoring System (TPMS) in your 2011 Ford Edge helps you stay informed about your tires. Sometimes, you’ll need to reset TPMS for accurate readings and better driving. This guide will show you how to reset the TPMS on your 2011 Ford Edge. It’s perfect for DIY fans or anyone who wants to know more about their vehicle. Follow these steps to reset TPMS with ease.
Drivers might need to reset TPMS for reasons like tire rotation or sensor replacement. Knowing how to do this can save you time and money. For more information, check out this guide on resetting TPMS on a 2011 Ford.
Monitoring tire pressure is more than just a convenience. It’s about keeping your vehicle safe, saving fuel, and ensuring your safety on the road. Learning how to reset TPMS will help you keep your Ford Edge in excellent condition.
Understanding TPMS System in Your Ford Edge
Modern cars use advanced tech to keep drivers informed about their vehicle’s health. The Tire Pressure Monitoring System (TPMS) is key for keeping your Ford Edge safe and running well.
What is a Tire Pressure Monitoring System?
A TPMS is an electronic system that checks your car’s tire air pressure. If the pressure gets too low, the TPMS light turns on. This light warns you of possible tire problems, helping avoid accidents and keeping your car in top shape.
How TPMS Sensors Work
Sensors are installed inside each tire
They always check the tire pressure in real-time
Send pressure data to the car’s computer
Alert you with a warning when pressure is low
Common TPMS Warning Signs
It’s important to know when the tire pressure warning light comes on. Look out for these signs:
The tire pressure warning light on your dashboard
Any sudden changes in how your tires perform
Uneven wear on your tires
Not getting the usual fuel efficiency
Keeping an eye on your TPMS can stop tire damage. It makes driving your Ford Edge safer.
When to Reset TPMS on 2011 Ford Edge
Knowing when to reset your Ford TPMS is key for your car’s safety and performance. A low tire pressure warning means it’s time to act on your tire pressure monitoring system.
After changing or rotating tires
When replacing tire pressure sensors
Following battery disconnection or replacement
When experiencing persistent low tire pressure warning
Tire care is vital for your vehicle’s safety. If you see uneven tire pressure readings or get many low tire pressure warnings, your TPMS might need a reset. You can find more on fixing electronic issues from technical reset guides.
Keeping an eye on your tires helps avoid problems and keeps your car running well. Mechanics suggest checking your TPMS during regular maintenance to spot any sensor issues early.
Essential Tools and Preparation for TPMS Reset
Resetting the TPMS sensor on a 2011 Ford Edge needs careful planning. The right tools and preparation are key. This ensures a smooth reset and avoids problems during repair.
Required Equipment
Before you start, make sure you have these tools:
TPMS reset tool or OBD-II scanner
Tire pressure gauge
Air compressor or tire inflation device
Owner’s manual for specific instructions
Safety Precautions
Always prioritize safety when working on your vehicle. Here are important steps:
Park vehicle on a flat, stable surface
Engage parking brake
Turn off engine completely
Wear protective gloves
Work in a well-ventilated area
Vehicle Preparation Steps
Getting your vehicle ready is key for a successful TPMS reset. First, check the tire pressures. Make sure they match the manufacturer’s recommendations. Also, ensure all tires are cold and at the correct PSI, as stated in your 2011 Ford Edge manual.
By following these steps, you’ll be ready for a successful TPMS sensor reset. This keeps your vehicle’s tire monitoring system in top shape.
Step-by-Step Guide to Reset TPMS on 2011 Ford Edge
Resetting the Tire Pressure Monitoring System (TPMS) on your 2011 Ford Edge is a detailed task. The tpms relearn procedure might seem hard, but it’s doable with the right steps.
Before you start, make sure you have these tools:
Tire pressure gauge
Air compressor
TPMS reset tool (optional)
Here are the steps to reset TPMS:
Check all tire pressures and inflate to recommended specs
Turn the ignition to the “on” position without starting the engine
Press and hold the TPMS reset button under the steering wheel
Wait for the tire pressure light to blink three times
Release the button and wait three minutes
If you hit a snag during the reset process, check your manual or see a mechanic for help.
Remember: Do this maintenance every time you rotate or replace your tires. It keeps your tire pressure monitoring accurate.
Conclusion
Keeping your Ford Edge’s tires at the right pressure is key for its performance and safety. Learning about the tire pressure monitoring system (TPMS) is a big step in taking care of your vehicle. Regular checks and resets of your TPMS help your tires work their best and avoid road dangers.
Resetting the TPMS might seem hard at first, but with the right info and tools, you can do it easily. Your Ford Edge’s TPMS is a smart safety feature that warns you about tire pressure issues early. By following our guide, you can keep an eye on your tire health.
But taking care of your Ford Edge is more than just resetting the TPMS. You should also check your tires regularly, inflate them correctly, and get professional checks on time. If you have trouble with the TPMS reset, look in your vehicle’s manual or ask a certified Ford tech for help.
In the end, a well-kept tire pressure monitoring system makes driving safer, saves fuel, and reduces tire wear on your Ford Edge. Stay ahead, stay informed, and enjoy the confidence that comes with a well-maintained vehicle.
Driving with a Stabilitrak warning light can be nerve-wracking. This system helps keep your vehicle stable and in control. If you’re seeing a reset service Stabilitrak light issue, you’re not alone.
Modern General Motors vehicles have advanced stability control systems. These systems prevent skidding and keep your vehicle running well. The Stabilitrak warning light alerts you to potential problems. Knowing how to reset this light can save you time and money.
Our guide will show you three easy steps to reset the Stabilitrak light. These methods work for Chevrolet, GMC, and Cadillac vehicles. They help you fix common Stabilitrak system issues with ease.
By the end of this article, you’ll know how to diagnose and reset Stabilitrak warning lights. You’ll also learn how to prevent future issues. Let’s explore the simple steps to fix this common car problem.
Understanding the Stabilitrak System and Warning Lights
The Stabilitrak system is a key safety feature in today’s cars. It helps drivers stay in control, even when driving gets tough. General Motors created this system to stop skidding and accidents.
If your Stabilitrak light comes on, it means something’s wrong with your car’s stability control. Don’t ignore this warning. It could mean your car isn’t safe or working right.
Common Causes of Stabilitrak Warnings
Faulty wheel speed sensors
Low battery voltage
Damaged steering angle sensors
Malfunctioning brake system components
Electrical system irregularities
Different Types of Stabilitrak Dashboard Indicators
The Stabilitrak warning light can show up in different ways. It’s usually yellow or amber. Some cars also show error codes or messages, giving more info.
Impact on Vehicle Safety and Performance
A working Stabilitrak system is vital for safe driving. It helps keep your car stable in tricky situations. If the light comes on, your car might not handle as well, making accidents more likely.
Reduced traction control effectiveness
Potential loss of steering responsiveness
Increased risk of vehicle instability
Acting fast on Stabilitrak warnings can avoid bigger problems. It keeps your car safe on the road.
Signs That Your Stabilitrak System Needs Attention
Modern cars have advanced safety systems for smooth driving. The Stabilitrak system is key, checking your car’s performance. It helps keep control in tough driving situations. Spotting early signs of Stabilitrak issues can stop bigger problems later.
Drivers should watch for several signs that might mean Stabilitrak trouble codes are there:
Unexpected dashboard warning lights lighting up
Less traction or stability while driving
Unusual steering wheel resistance or vibration
Electronic stability control not working right
If your car has ongoing traction control problems, act fast. The system might show error messages needing a pro’s check. Look out for sudden power loss, odd acceleration, or unexpected brake use.
Keep an eye on your car’s performance for small changes. A certified mechanic can spot issues early. Check your car’s manual for help, like comprehensive vehicle documentation.
Watching for these signs and acting quickly can save money and keep your car safe.
Essential Tools and Preparations for Reset Service Stabilitrak Light
Getting ready for a gm stabilitrak service needs careful planning and the right tools. The right preparation makes the process smoother. It helps you fix the chevy stabilitrak light well. Take time to gather your tools and set up your workspace for a successful reset.
Required Equipment and Safety Gear
Before you start the stabilitrak system reset, you’ll need some tools:
OBD-II scanner (compatible with GM vehicles)
Work gloves
Safety glasses
Diagnostic code reader
Flashlight
Vehicle-Specific Documentation
Collecting the right documents is key for a successful gm stabilitrak service. Get these important papers:
Vehicle owner’s manual
Vehicle maintenance records
Recent repair documentation
Vehicle identification number (VIN)
Workspace Setup Requirements
Creating a good workspace is important for a safe and efficient chevy stabilitrak light reset. Choose a well-lit, clean area with enough space. Make sure you have a flat surface and access to your vehicle’s battery and diagnostic ports. Keep your tools organized and within reach to make the reset process easier.
GM Stabilitrak Service: Step-by-Step Reset Process
Dealing with a Stabilitrak system warning can be frustrating. The good news is that resetting the Stabilitrak system is often easy. You can do it with basic tools and patience.
Before starting the stabilitrak system reset, gather these essential items:
OBD-II scanner
Vehicle owner’s manual
Basic hand tools
Safety gloves
To clear stabilitrak codes, follow these precise steps:
Locate the OBD-II port under your vehicle’s dashboard
Connect the OBD-II scanner securely
Turn the ignition to the “on” position without starting the engine
Select “Read Codes” on the scanner
Choose the option to clear diagnostic trouble codes
Disconnect the scanner and restart the vehicle
If the scanner method doesn’t work, you might need to try alternative approaches. Some GM vehicles require battery disconnection to reset the system. Disconnect the negative battery terminal for about 10 minutes. This can help reset electronic systems.
Always prioritize safety during the stabilitrak system reset. If you’re uncomfortable performing these steps, consulting a professional mechanic is recommended.
Preventing Future Stabilitrak System Malfunctions
To keep your vehicle’s Stabilitrak system working well, you need to take care of it. Owners can lower the chance of stabilitrak warning light problems by following some simple steps.
Regular Maintenance Schedule
Having a regular maintenance plan is key to avoiding stabilitrak trouble codes. Here are some important steps:
Check tire pressure and alignment every quarter.
Inspect the suspension system once a year.
Check the brakes regularly.
Test the wheel sensors often.
Best Practices for System Care
To keep your Stabilitrak system in top shape, drive carefully and maintain it well. Avoid sudden, harsh driving. Instead, use smooth starts, gentle brakes, and keep the vehicle balanced.
Warning Signs to Watch For
Spotting Stabilitrak problems early can save you from expensive fixes. Look out for these signs:
Unexpected dashboard warning lights.
Steering wheel feels stiff or hard to turn.
Vehicle pulls to one side while driving.
Stability feels off during turns or on slippery roads.
By following these tips, you can keep your Stabilitrak system running smoothly. This ensures your safety on the road.
Conclusion
Learning to reset the service Stabilitrak light is more than a skill. It’s about keeping your car safe and running well. The steps we’ve shared make it easy to fix Stabilitrak system warnings without stress or high repair costs.
The Stabilitrak system is a key safety feature in your car. It helps keep your vehicle stable in tough driving situations. If warning lights come on, acting fast can avoid bigger problems. By learning how to reset Stabilitrak, you’ve gained important car care knowledge.
Keeping up with regular car maintenance is crucial to avoid Stabilitrak issues. Regular checks and knowing your car’s signals can save you money and time. For more car care tips, check out detailed digital guides that make you a better car owner.
While DIY resets are useful, don’t ignore warning lights that keep coming on. They might mean serious mechanical issues. If you’re unsure, it’s best to get a professional mechanic to check your car. This ensures your car runs safely and efficiently.
Many homeowners face issues with their garage door systems that need a reset. Knowing how to reset a Liftmaster garage door opener can save you time and reduce stress. It also makes your home’s main entry point work smoothly again.
Whether you’re dealing with technical problems or want to change your system’s settings, it’s key to learn the liftmaster reset instructions. A correct reset can fix connectivity issues, update remote controls, and keep your system running well.
This guide will show you how to reset your Liftmaster garage door opener step by step. You’ll find ways to solve common problems and control your garage door system confidently.
By using our expert tips, you’ll learn to handle technical issues safely and well. Get ready to become your own garage door system expert!
Understanding Your Liftmaster Garage Door System
Exploring garage door openers can be daunting. Liftmaster offers a variety of systems to simplify your life. Knowing your garage door opener model is key for troubleshooting and repair.
Today’s Liftmaster garage door openers have advanced features. They make home access and security easier. Understanding the parts helps you fix issues fast.
Common Liftmaster Models and Their Features
8500 Series: Ideal for heavy doors with powerful DC motor
3240 Series: Quiet belt drive system for residential use
Elite Series: Smart technology with MyQ mobile connectivity
Security+ 2.0: Enhanced rolling code protection
Basic Components of Your Garage Door Opener
Motor unit: Powers the door’s movement
Rail system: Guides the door during opening and closing
Safety sensors: Prevents door closure on obstacles
Identifying Your Specific Model Number
Finding your Liftmaster model number is crucial for troubleshooting. Look on the motor unit’s side panel or inner compartment. The model number starts with numbers and tells you about your system.
Knowing your garage door opener’s details helps with maintenance and fixing issues.
Why You Might Need to Reset Your Liftmaster Garage Door Opener
Garage door openers sometimes need a reset to work right. Knowing when and why can save you time and headaches.
Persistent electrical disruptions or power outages
Unresponsive remote control functionality
Unexpected system glitches or erratic door movement
After installing new electrical components
Power issues can mess up your garage door opener. A reset might fix it. Modern Liftmasters have safety features but still need care.
Problems like misaligned sensors or wireless interference can affect your garage door. Knowing these issues helps you keep your garage door system in top shape.
Experts say to check and reset your opener regularly. It’s not a big deal but keeps your opener running smoothly.
Essential Safety Precautions Before Starting the Reset Process
Fixing your garage door opener needs careful steps and safety first. Before you start any liftmaster troubleshooting, make sure you’re safe. This prevents accidents and damage to your equipment.
Always put safety first when working with garage door systems. These tips will help you reset your system safely.
Required Tools and Materials
Protective safety glasses
Non-conductive work gloves
Stable ladder
Voltage tester
Flashlight
Screwdriver set
Electrical Safety Guidelines
Electrical safety is key when fixing your garage door opener. Always turn off the power at the circuit breaker before starting. This stops sudden electrical surges and shock hazards.
Shut off power at the main electrical panel
Use a voltage tester to confirm no electricity is present
Wear rubber-soled shoes for additional protection
Mechanical Safety Considerations
When doing liftmaster troubleshooting, be careful with moving parts. They can hurt you if not handled right. Make sure the garage door is fully supported and won’t drop unexpectedly.
Disengage the door from the opener track
Use manual support mechanisms
Keep hands and clothing away from moving components
Work in a well-lit area
By following these safety tips, you can reset your garage door opener safely and with confidence.
How to Reset Liftmaster Garage Door Opener
Resetting your Liftmaster garage door opener can fix many problems and make it work smoothly again. The steps to reset it vary a bit based on your model. But, most homeowners can do it safely and easily.
Ladder
Screwdriver
Owner’s manual
Flashlight
To reset your Liftmaster garage door opener, follow these steps:
Unplug the garage door opener from the electrical outlet
Wait 30 seconds to let the internal circuits discharge
Plug the unit back into the power source
Press and hold the learn button for 6 seconds
Look for a blinking light to know if it’s reset successfully
Some models might need a bit of a different approach. For exact instructions, check your opener’s manual or call Liftmaster support.
After resetting, test your garage door opener a few times. Make sure remote controls, wall buttons, and safety sensors work right.
Programming Your Keypad and Remote Controls
After resetting your Liftmaster garage door opener, you’ll need to set up your remote controls and keypad again. This makes sure your garage door system works well and safely.
Syncing New Remote Controls
Programming your remote controls for Liftmaster is easy:
Find the “Learn” button on your garage door opener
Press and release it
Press the button on your remote within 30 seconds
See the opener’s light blink to confirm it’s working
Setting Up Wireless Keypad Access
Resetting your wireless keypad needs care. Here’s how to do it:
Clear any old codes from the keypad
Hold the programming button to enter mode
Enter your new access code
Check that the code works right
MyQ App Configuration Steps
Modern Liftmaster systems connect to the MyQ app. Download the app, make an account, and follow the instructions. This lets you control your garage door from your phone, making your home more secure and convenient.
Troubleshooting Common Reset Issues and Error Codes
Dealing with Liftmaster problems can be tough, but most errors have simple fixes. Learning to read these signals can save you a lot of time. It also helps avoid costly service calls.
When you see Liftmaster error codes, first figure out what they mean. Different light patterns tell you a lot about your garage door opener’s health.
1-2 blinks: Means the sensors are not aligned right
3-4 blinks: Points to motor or mechanical problems
5-6 blinks: Shows possible electrical connection issues
To fix Liftmaster issues, follow these steps:
Check the power connections
Make sure the sensors are aligned
Look over the mechanical parts
Reset the system fully
If error codes keep showing up after trying these steps, it’s time to check your manual or call Liftmaster support. Most problems can be fixed with the right diagnosis and a bit of patience.
Knowing how to read your garage door opener’s error messages is crucial. It helps you keep your system running smoothly.
Conclusion
Resetting a Liftmaster garage door opener is easier than you think. By following the step-by-step guide, you now know how to fix and keep your garage door working well. Regular maintenance keeps it running smoothly and makes it last longer.
Checking your garage door often and resetting it when needed can stop big problems. If you still have issues, it’s okay to call a professional. Some problems need special skills. Looking at your owner’s manual can also help with fixing problems.
Always put safety first. Take your time, follow the instructions, and don’t try to fix things you’re not sure about. With practice, you’ll get better at taking care of your garage door opener.
Being careful with your Liftmaster system will make it work better and give you peace of mind. Keep this guide for future use. Resetting your garage door opener will become easier with time and attention to detail.
Keeping your Hitachi projector in good shape means regular filter care. Knowing how to reset the filter time is key for any projector owner. This guide will show you how to reset filter time on Hitachi projector, so your projector keeps showing clear images and presentations.
Projector filters are vital for keeping dust and debris out. If they get clogged, your projector’s performance drops. Resetting the filter time regularly keeps your projector running smoothly and lasts longer.
Whether you use your projector for work, teaching, or fun at home, knowing how to maintain the filter is important. We’ll make the filter reset process simple for everyone to follow.
Experts say it’s smart to do this maintenance often to avoid problems. With our detailed guide, you’ll feel confident in taking care of your projector’s filter.
Keeping your Hitachi projector in top shape is key. The filter is vital in keeping dust and debris out. This makes filter care a must for your projector’s health.
Why Filter Maintenance Matters
Filter care is more than just a quick clean. A clean filter means:
Best image quality
Better cooling
Longer projector life
Less risk of damage to parts inside
Signs Your Projector Filter Needs Attention
Knowing when to clean or replace your filter is important. Look out for these signs:
Dimmer brightness or image
Louder fan noise
Dust on the filter
Less cooling
Locating the Filter Components
Finding the filter is easy with the right help. Check your Hitachi projector user manual for where it is. Filters are usually near air vents and can be found by removing a side or bottom panel.
Regular checks and care can avoid expensive fixes. It keeps your projector working well for presentations and fun.
How to Reset Filter Time on Hitachi Projector
Keeping your Hitachi projector in top shape means regular filter care. This includes knowing how to reset the projector lamp timer. Resetting the filter counter is easy and can make your device last longer.
To start the hitachi projector lamp timer reset, follow these key steps:
Power on your Hitachi projector completely
Navigate to the main menu using the remote control or projector buttons
Locate the “Filter” or “Maintenance” section in the settings menu
Select the “Reset Filter Hours” option
Confirm the reset by pressing “Yes” or “Enter”
When resetting the projector lamp hours, watch the menu closely. Some Hitachi models need you to press and hold certain buttons to reset. If you’re stuck, check your user manual for exact steps.
Pro tip: Reset the filter time after cleaning or changing the projector filter. This keeps track of when you need to do maintenance. Also, it keeps your projector working well. Keep your device clean and reset the filter counter often to avoid problems.
Conclusion
Keeping your Hitachi projector in top shape is key to its performance and longevity. By following the filter reset process and paying attention to your projector, you avoid image quality problems and expensive fixes. It’s not just about the filter; replacing the lamp on time is also crucial.
At first, projector maintenance might seem complex. But the steps in this guide make it easy. Each task, from cleaning the filter to checking your user manual, helps keep your projector running smoothly.
Experts say to treat your projector like a fine instrument. Regular maintenance, like resetting the filter and replacing the lamp, prevents sudden failures. Spending a few minutes on upkeep keeps your equipment in top condition and ensures great visuals.
Your Hitachi projector is more than a device; it’s a tool for clear presentations, movie nights, and professional displays. By following these maintenance tips, you’ll enjoy reliable performance for many years. A well-cared-for projector is a reliable one.
Dealing with software problems on your iPad can be really frustrating. Knowing how to put your iPad in recovery mode can help avoid bigger issues. If your iPad freezes, won’t respond, or keeps having software problems, recovery mode is a good fix.
This guide will show you how to fix complex iPad problems using recovery mode. Learning how to enter recovery mode is key for any iPad user.
Recovery mode is a lifesaver when usual fixes don’t work. Our detailed instructions will help you handle tough iPad software issues safely and effectively.
Our guide is easy to follow, even if you’re not tech-savvy. We’ll walk you through everything from checking if your iPad is compatible to taking the right steps. You’ll learn how to manage your iPad’s software problems with confidence.
Understanding iPad Recovery Mode Basics
iPad recovery mode is a powerful tool for fixing software issues. It helps when usual fixes don’t work. This mode lets you force restart your iPad and fix ongoing problems.
Apple devices sometimes face software problems that need deeper fixes. Recovery mode is key when your iPad has:
Persistent system freezes
Software update failures
Unresponsive touchscreen
Boot loop problems
When to Use Recovery Mode
Use recovery mode for specific issues. It’s best when your iPad won’t respond or gets stuck during an update. Professional recovery tools can tackle tough software problems.
Compatible iPad Models and iOS Versions
Recovery mode works on many iPad models, including:
iPad Pro (all generations)
iPad Air (3rd generation and newer)
iPad (6th generation and later)
iPad mini (5th generation and above)
Required Tools and Preparation
Before starting recovery mode, get these items ready:
Compatible computer with latest iTunes or macOS
Original USB charging cable
Stable internet connection
Backup of important data
Being prepared helps the recovery process go smoothly and keeps your data safe.
How to Put iPad in Recovery Mode
Having trouble with your iPad can be really frustrating. But, recovery mode is a strong tool to fix these issues. It helps when your iPad freezes or has ongoing software problems. Learning how to use recovery mode can save you a lot of time and stress.
Here are the steps to restore your iPad from recovery mode, based on your device model:
For iPads with Home Button
Connect your iPad to a computer using the original USB cable
Press and hold the Home and Power buttons at the same time
Release the Power button while still holding the Home button
Wait until the recovery mode screen shows up
For iPads with Face ID
Quickly press and release the Volume Up button
Quickly press and release the Volume Down button
Press and hold the Power button until the recovery mode screen appears
If your iPad freezes and needs recovery mode, these steps can help you get back in control. Make sure your computer has the latest iTunes or Finder (for macOS Catalina and later) before trying to restore your iPad.
Keep your iPad connected during the whole process
Have a recent backup of your data before starting
Follow the on-screen instructions carefully
Professional tip: If the first try doesn’t work, try again and make sure your iPad and computer are well connected.
Conclusion
Learning to update your iPad software via recovery mode is key for Apple device users. This guide has shown you how to use recovery mode. It helps you fix problems with your device.
Recovery mode is great for fixing software issues or when your iPad won’t turn on. By learning how to update your iPad this way, you’ve got a useful trick. It works on many iPad models and iOS versions.
But, it’s also important to prevent problems. Back up your iPad data regularly with iCloud or iTunes. This guide is here for you whenever you need to reset or update your software.
Now, you can tackle most software problems your iPad faces. Stay ahead by keeping your device updated. And remember, recovery mode is there when you need it.
Digital creativity meets precision with the Apple Pencil. It turns your iPad into a powerful tool for art and work. Whether you’re a designer or a student, learning to pair the Apple Pencil with your iPad opens new doors.
Apple has two Apple Pencil generations, each for specific iPad models. Knowing how to pair them can make your digital work better. It makes drawing, sketching, and note-taking easier and more fun.
Modern Apple devices make connecting easy. For a detailed guide on pairing and fixing issues, check out this expert resource on Apple Pencil connectivity.
This guide will show you how to pair your Apple Pencil. You’ll be ready to create, design, and explore your iPad’s full potential in no time.
Understanding Apple Pencil Compatibility with Different iPad Models
Apple Pencil works differently on various iPad models. Picking the right Apple Pencil can make your drawing, note-taking, and creative work better.
Apple has made two Apple Pencil versions. Each is for certain iPad models. Knowing which Apple Pencil fits your iPad can save you time and avoid buying the wrong one.
First Generation Apple Pencil Compatible Devices
The first Apple Pencil fits several older iPad models, including:
iPad Pro (12.9-inch) 1st and 2nd generation
iPad Pro (10.5-inch)
iPad Pro (9.7-inch)
iPad (6th, 7th, and 8th generation)
iPad Air (3rd generation)
Second Generation Apple Pencil Compatible Devices
The second Apple Pencil works with newer iPad Pro models, including:
iPad Pro (12.9-inch) 3rd, 4th, and 5th generation
iPad Pro (11-inch) 1st, 2nd, and 3rd generation
iPad Air (4th and 5th generation)
iPad mini (6th generation)
How to Check Your iPad’s Apple Pencil Compatibility
To see if your iPad works with Apple Pencil, follow these steps:
Go to Settings on your iPad
Tap “General”
Select “About”
Check your model name and compare with Apple’s list
Visit Apple’s official website for the latest info
Knowing your iPad’s Apple Pencil compatibility helps you choose the right tool for your creative projects.
How to Pair Apple Pencil with iPad: Step-by-Step Instructions
Pairing an Apple Pencil with your iPad is easy. It opens up new creative possibilities for artists, students, and professionals. The steps are simple, whether you have the first or second-generation Apple Pencil.
Remove the cap at the end of the Apple Pencil
Plug the Pencil into the Lightning port of your iPad
Tap “Pair” when the connection prompt appears
For the second-generation Apple Pencil, pairing is even simpler:
Attach the Apple Pencil magnetically to the side of your compatible iPad
A pairing confirmation will automatically appear on the screen
Tap “Pair” to complete the connection
To charge your Apple Pencil, attach it to the magnetic strip for newer models. For the first-generation, plug it into the Lightning port. Apple pencil ipad tutorials suggest checking battery levels in Bluetooth settings for smooth use.
Pro tip: Update your Apple Pencil with the latest iOS software. This ensures it works best with your iPad.
Troubleshooting Common Apple Pencil Connection Issues
Even the most advanced tech can sometimes run into hiccups. When working with apple pencil ipad notes or creating apple pencil ipad art, users might encounter connection challenges. Don’t worry—most issues are simple to resolve with a few quick steps.
Apple Pencil Not Connecting to iPad
A disconnected Apple Pencil can interrupt your creative workflow. Try these troubleshooting techniques:
Restart your iPad completely
Check for recent software updates
Verify Apple Pencil compatibility with your iPad model
Ensure Bluetooth is turned on in Settings
Battery and Charging Problems
Keeping your Apple Pencil charged is crucial for uninterrupted drawing and note-taking. Here are some charging tips:
Check battery percentage in iPad settings
Clean the charging connector gently
Use original Apple charging adapters
Avoid extreme temperatures during charging
Bluetooth Connection Issues
Persistent Bluetooth problems can disrupt your apple pencil ipad notes experience. Quick fixes include:
Forget and re-pair the Apple Pencil
Reset iPad’s Bluetooth settings
Update iPadOS to the latest version
Check for physical damage to the Pencil
With these strategies, you’ll quickly restore your Apple Pencil’s connection and return to creating amazing digital art and notes.
Conclusion
Using an Apple Pencil with your iPad Air unlocks a world of digital creativity and productivity. It’s great for sketching, taking detailed notes, or improving your workflow. This accessory makes your iPad a very versatile tool.
Connecting your Apple Pencil is easy, whether it’s the first or second generation. It offers precise drawing and smooth note-taking. This makes your digital interactions more intuitive and responsive.
The Apple Pencil is a game-changer for many. Artists can make amazing iPad art with it. Students and professionals can take notes quickly and efficiently. It works well with many iPad models, so most people can use it.
Knowing how to use your Apple Pencil is key. Learn about compatibility, connection methods, and how to fix issues. Try out different apps to see all the cool things you can do with it.
Downloading a printable manual for your Samsung Galaxy S25 can greatly enhance your experience with this powerful device. Whether you’re a tech novice or a seasoned user, having the user manual at your fingertips allows you to unlock the full potential of your smartphone. This guide will walk you through the steps to download the Samsung Galaxy S25 manual, ensuring you have all the information you need to navigate your device with ease.
Why You Need the Samsung S25 Manual PDF?
New users may find the Samsung Galaxy S25’s advanced features and settings overwhelming. The user manual serves as an essential resource, offering:
Easy Setup: Step-by-step instructions on activating your device, setting up email, and configuring network settings.
Feature Exploration: Detailed explanations of various features and settings available on your Galaxy S25.
Troubleshooting Tips: Guidance on resolving common issues like connectivity problems, battery life concerns, and app functionality.
Go to the Samsung support website, where you can find user manuals for all devices.
Search for Your Device:
Use the search bar to enter “Samsung Galaxy S25” and locate the specific model you own.
Access the User Manual:
• Once you locate your device, search for the “User Manual” or “Download Manual” section. This will typically be in PDF format.
Download and Save:
Click on the download link to save the manual directly to your computer or mobile device. Ensure you choose a location that is simple to remember.
Print Your Manual (Optional):
If you prefer a hard copy, open the downloaded PDF file and select the print option. Adjust settings as necessary to fit your preferences.
Tips for Using Your Galaxy S25 User Manual
Bookmark Important Sections: As you explore your manual, bookmark sections that are particularly useful for quick access in the future.
Use Search Functions: Most PDF readers allow you to search for specific terms or features within the document, making it easier to find what you need.
Keep It Handy: Whether on your device or as a printed copy, having your manual accessible will help you troubleshoot issues and learn new features as they arise.
Can I find the Samsung S25 user guide in multiple languages?
In summary, whether you’re looking for the manual in English or another language, you should be able to find it through Samsung’s official resources or community websites.
Conclusion
Having a downloadable and printable manual for your Samsung Galaxy S25 is not just convenient; it’s essential for making the most of your smartphone experience.
By following these steps, you can easily access comprehensive information about setup, features, and troubleshooting. Embrace your new device with confidence by keeping this valuable resource close at hand—your journey into the world of advanced smartphone technology starts here!
The Apple iPhone 16 represents another leap forward in mobile technology, packed with new features and innovations that enhance the user experience. Whether you’re a long-time Apple user or new to the ecosystem, having the official iPhone 16 user guide can be incredibly helpful in getting the most out of your device.
Below, we provide a step-by-step guide on how to download the iPhone 16 manual, ensuring that you have access to everything you need to know about your phone.
Where to Find the Apple iPhone 16 User Guide
The official Apple iPhone 16 user guide is available directly from Apple, ensuring that you’re getting accurate and up-to-date information. Here’s where you can find it:
Apple’s Official Website: The first place to look for the iPhone 16 manual is on Apple’s official website. Apple typically provides user guides for all their devices in PDF format or as an interactive online version.
Apple Books App: For those who prefer a more interactive experience, Apple offers the user guide via the Apple Books app. This is an excellent way to access the guide on your iPhone, iPad, or Mac, providing you with a searchable and easy-to-navigate version of the manual.
Support.apple.com: Another reliable source is support.apple.com. This site houses all Apple support documents, including the full user guide.
How to Download the iPhone 16 User Guide from Apple’s Website
Downloading the iPhone 16 manual from Apple’s official website is a straightforward process. Here’s a detailed guide:
Visit Apple’s Official Support Page: Start by going to support.apple.com, which is Apple’s official support page. Here, you will find links to manuals, guides, and troubleshooting advice for all Apple products.
Search for “iPhone 16 User Guide”: In the search bar, type “iPhone 16 user guide.” This will bring up the official manual, usually in PDF format.
Select the Official Guide: Once you find the correct link to the iPhone user guide, click on it to open the document.
Download the Guide: On the user guide page, look for the download button (usually a small downward-facing arrow). Click on it, and the guide will be saved to your device.
You can save this PDF version on your computer, tablet, or phone so you can easily get to it whenever you need to.
How to download the iPhone 16 Manual from Apple Books
Downloading the iPhone 16 user guide from the Apple Books app is just as simple. Follow these steps:
Open the Apple Books App: On your iPhone, iPad, or Mac, launch the Apple Books app.
Search for the Guide: Use the search function at the top of the screen to search for “iPhone 16 user guide.” Apple typically makes these guides available as free downloads.
Download the User Guide: Once you locate the guide in the search results, tap on it, then tap the “Get” button to download it to your device.
Access the Guide: After downloading, the user guide will be accessible in your library within the Apple Books app, allowing you to refer to it at any time.
The Apple Books version is interactive, meaning you can search for specific terms and navigate through the content easily. It also offers a user-friendly interface that is optimized for Apple devices.
Using the iPhone 16 User Manual Offline
One of the biggest advantages of downloading the iPhone 16 user manual is the ability to access it offline. This can be especially useful when traveling or in areas where internet access is limited.
Whether you’ve downloaded the guide as a PDF or through Apple Books, having it available offline ensures that you can reference it whenever necessary, even without an internet connection.
To ensure offline access, simply download the user guide to your device, as described above. Because the guide will be saved locally, you will be able to access it whenever you want, regardless of whether or not you have an internet connection.
Getting the Most Out of your iPhone 16 with the Guide
The iPhone 16 is a powerful device with a wealth of features that can enhance your daily life. However, fully utilizing these features often requires a deeper understanding of the phone’s capabilities.
The iPhone 16 user guide provides detailed instructions and insights to help you maximize your device’s potential.
From mastering Face ID and Apple Pay to understanding iCloud backup and privacy settings, the guide ensures you’re not only using your iPhone 16 efficiently but also securely. Whether you’re a casual user or a tech enthusiast, the user guide will be an invaluable resource.
Conclusion
Downloading the Apple iPhone 16 user handbook is vital for understanding and improving gadget features. Whether you download it from Apple’s website or the Apple Books app, this guide will keep you educated and ready to optimize your iPhone 16.
A factory reset, also known as a master reset, is a powerful tool for refreshing your Samsung Galaxy phone to its original settings. This process can be incredibly useful if you’re experiencing persistent issues, preparing to sell or give away your device, or simply wanting a fresh start. By erasing all personal data and restoring the phone to its factory setting, a factory reset can resolve software problems and improve overall performance.
Performing factory reset on Samsung Galaxy phone involves a series of straightforward steps. However, it’s crucial to back up all important data before proceeding, as the reset will erase everything from your device. This guide will walk you through the necessary steps to perform a factory reset, ensuring you do so safely and effectively.
Step-by-step guide on how to factory reset Samsung Galaxy phone
Make sure to back up all your important files, photos, contacts, and other data before beginning the reset process. You can use Samsung’s Smart Switch app, Google Drive, or any other reliable backup service to save your information.
Method 1: Using the Settings Menu
Open the Settings app: Begin by tapping the Settings icon, usually represented by a gear symbol.
Navigate to General Management: Scroll down and select ‘General Management.’
Tap Reset: Under General Management, find and tap on ‘Reset.’
Select Factory Data Reset: Choose ‘Factory Data Reset’ from the list of options.
Review Information: Read through the information provided, detailing what will be erased during the reset.
Confirm Reset: Tap ‘Reset’ or ‘Delete All,’ then enter your PIN, password, or pattern if prompted.
Final Confirmation: Confirm your action once more to begin the factory reset process. Your phone will restart and begin erasing all data.
Method 2: Using hardware buttons
Power Off the Device: Ensure your phone is completely turned off.
Press and Hold Buttons: Simultaneously press and hold the Volume Up button, the Power button, and the Bixby button (if your device has one).
Release Buttons: When the Samsung logo appears, release all buttons.
Navigate the Recovery Menu: Use the Volume Down button to navigate to ‘Wipe Data/Factory Reset’, and press the Power button to select it.
Confirm Selection: Use the Volume Down button to highlight ‘Yes’ and press the Power button to confirm.
Reboot System: Once the reset is complete, select ‘Reboot System Now’ using the Power button.
Troubleshooting Common Issues During factory reset Samsung Galaxy phone
Sometimes, you might encounter issues during the factory reset process. If your phone freezes or gets stuck during the reset, try performing a soft reset by holding the Power button and the Volume Down button simultaneously until the device restarts. If this doesn’t resolve the issue, you may need to attempt the hardware button reset method again.
Another common issue is that the device does not boot up after a reset. Ensure your phone has sufficient battery life, or connect it to a charger and try restarting it. If problems persist, consider seeking professional assistance or visiting a Samsung service center.
Precautions to take before and after Factory Reset
Before initiating a factory reset, double-check that all essential data is backed up. It’s also wise to remove any external storage, such as SD cards, to prevent data loss. Additionally, ensure your device is charged to at least 50% to avoid any interruptions during the reset process.
After performing a factory reset, you will need to set up your device from scratch. Reinstall apps, restore backed-up data, and reconfigure settings to your preference. It’s also a beneficial opportunity to update your device to the latest software version to ensure optimal performance and security.
Conclusion
Factory resetting your Samsung Galaxy phone can be a beneficial process to resolve software issues and refresh your device. Remember, backing up your data is essential before starting a factory reset to prevent any loss of important information. If you encounter any difficulties during the process, don’t hesitate to seek professional help to ensure a smooth and successful reset. By following these steps, you can confidently perform a factory reset on your Samsung Galaxy phone and enjoy a refreshed and efficient device.
In the world of gaming, every millisecond counts. Whether you’re a casual gamer or a competitive esports professional, having the right equipment can make all the difference in your gaming performance. One often-overlooked piece of hardware that can significantly enhance your gaming experience is a low profile wireless mechanical keyboard. In this article, we will explore the benefits of using such a keyboard, factors to consider when choosing one, and how to optimize your gaming experience with this essential gaming gear.
Why a low profile mechanical keyboard is essential for gamers
Traditional keyboards may get the job done, but they are not optimized for gaming. Low profile mechanical keyboards, on the other hand, are specifically designed to meet the needs of gamers. With their shorter key travel and faster actuation points, these keyboards allow for lightning-fast response times. This can be the difference between a well-timed headshot and defeat.
Moreover, low profile mechanical keyboards offer a more comfortable gaming experience. The reduced key travel distance reduces finger fatigue during long gaming sessions, allowing you to stay focused and perform at your best for hours on end. Additionally, the tactile feedback and satisfying click sound of mechanical switches provide a level of precision and satisfaction that membrane keyboards simply can’t match.
Benefits of using a wireless mechanical keyboard for gaming
One of the biggest advantages of a wireless mechanical keyboard is the freedom it provides. No longer will you be tethered to your desk by a cable. With a wireless keyboard, you can comfortably position yourself wherever you please, whether it’s leaning back on your gaming chair or sitting on the couch. This freedom of movement allows for a more immersive gaming experience and greater flexibility in your gaming setup.
Furthermore, a wireless mechanical keyboard eliminates the clutter of cables on your desk, giving you a clean and organized gaming space. This not only improves the aesthetics of your setup but also reduces the chances of accidentally tangling or damaging the cables during intense gaming sessions. Additionally, many wireless mechanical keyboards offer customizable RGB lighting, allowing you to create a visually stunning gaming environment that matches your personal style.
Factors to consider when choosing a low profile wireless keyboard
When it comes to choosing a low profile wireless mechanical keyboard for gaming, there are a few key factors to consider. Firstly, you’ll want to pay attention to the type of switches used in the keyboard. Different switches offer varying levels of tactile feedback and actuation force, so it’s important to choose the one that suits your gaming style and preferences. Popular options include Cherry MX Low Profile switches and Kailh Low Profile switches.
Another important consideration is the battery life of the keyboard. You don’t want to be interrupted in the middle of an intense gaming session due to a dead battery. Look for a keyboard with a long-lasting battery that can endure hours of gaming before needing to be recharged. Additionally, it’s worth considering keyboards that offer fast charging capabilities, allowing you to quickly top up the battery when needed.
Lastly, take into account the keyboard’s connectivity options. While wireless connectivity is the main attraction, it’s also useful to have the option of wired connectivity for times when a stable and low-latency connection is crucial. Some keyboards also offer Bluetooth compatibility, which can come in handy if you want to connect the keyboard to multiple devices, such as your gaming PC and smartphone.
How to optimize your gaming experience
Now that you have chosen the perfect low profile wireless mechanical keyboard for your gaming needs, it’s time to optimize your gaming experience. One of the first things you should do is familiarize yourself with the keyboard’s software, if it comes with one. This software allows you to customize the keyboard’s lighting effects, create macros, and remap keys to suit your specific gaming preferences. Spend some time exploring these features to tailor the keyboard to your liking.
In addition to customization, it’s important to keep your keyboard firmware up to date. Manufacturers often release firmware updates that improve performance and fix any bugs or issues. Check the manufacturer’s website regularly for any available updates and follow the instructions to keep your keyboard running smoothly.
Lastly, don’t forget about the importance of ergonomics. Invest in a comfortable gaming chair and position your keyboard and mouse at the correct height and angle to prevent strain and injuries. Consider using a wrist rest to support your wrists during extended gaming sessions. Taking care of your physical well-being will ultimately improve your gaming performance and longevity.
Tips for maintaining and cleaning your wireless mechanical keyboard
To ensure the longevity of your low profile wireless mechanical keyboard, regular maintenance and cleaning are essential. Start by gently removing any loose debris, such as crumbs or dust, from the keyboard using compressed air or a soft brush. Be careful not to apply too much pressure or use any liquids that could damage the switches or electronics.
For a more thorough cleaning, you can remove the keycaps and clean them separately. Fill a bowl with warm water and a mild detergent, then let the keycaps soak for a few minutes. Use a soft brush or toothbrush to gently scrub away any dirt or grime. Rinse the keycaps with clean water and let them dry completely before reattaching them to the keyboard.
Additionally, consider investing in a keyboard cover or dust cover to protect your keyboard from spills, dust, and other potential hazards. These covers are usually made of silicone and are easy to clean and remove when necessary.
Conclusion
In conclusion, a low profile wireless mechanical keyboard is a must-have for gamers looking to unleash their full gaming potential. With their lightning-fast response times, comfortable design, and wireless freedom, these keyboards can greatly enhance your gaming experience.
By considering factors such as switch type, battery life, and connectivity options, you can choose the perfect keyboard to suit your gaming style. And with regular maintenance and cleaning, your keyboard will continue to perform at its best for years to come. So, don’t underestimate the power of a low profile wireless mechanical keyboard; it may be the missing piece to take your gaming performance to the next level.
Welcome to the ultimate guide to the Galaxy S24 owners manual! If you are a proud owner of the Galaxy S24, then you are in for a treat. This comprehensive owner’s manual is your key to unlocking the full potential of your smartphone and enjoying a seamless smartphone experience.
In this guide, we will take you through everything you need to know about the Galaxy S24 owner’s manual. From understanding the benefits of having a comprehensive manual to exploring the advanced features and settings, we’ve got you covered. So, let’s dive right in!
Benefits of having a comprehensive Samsung Galaxy S24 owners manual
Having a comprehensive user guide for Samsung Galaxy S24 is like having a personal assistant at your fingertips. It provides you with all the information you need to navigate through the features and functions of your smartphone. Whether you are a tech-savvy individual or a beginner, the owner’s manual acts as your go-to resource for mastering your device.
One of the key benefits of having a comprehensive owner’s manual is that it saves you time and frustration. Instead of aimlessly searching through menus and settings, the manual provides you with clear instructions on how to perform specific tasks. Whether you want to customize your home screen or set up advanced security features, the manual will guide you step by step.
Another benefit of the Samsung S24 manual guide is that it helps you discover hidden features and shortcuts. The Galaxy S24 is packed with advanced features, and it’s easy to miss out on some of them if you don’t have a guide. The manual will introduce you to these hidden gems, allowing you to make the most of your smartphone.
Understanding the features and specifications of the Samsung Galaxy S24
To fully appreciate the Galaxy S24, it’s important to understand its features and specifications. Let’s start with the display. The Galaxy S24 boasts a stunning 6.7-inch Super AMOLED display, delivering vibrant colors and sharp details. Whether you are watching videos, playing games, or browsing the web, the display will provide you with an immersive experience.
The camera system on the Galaxy S24 is truly impressive. It features a 108-megapixel main camera, allowing you to capture stunning photos with incredible detail. The camera also supports 8K video recording, giving you the ability to shoot professional-grade videos right from your smartphone.
Under the hood, the Galaxy S24 is powered by a state-of-the-art processor, ensuring smooth performance and multitasking capabilities. With ample storage space and a long-lasting battery, you can store all your files and enjoy all-day usage without worrying about running out of power.
Exploring the advanced features and settings
Now that you have a good understanding of the basic features of the Galaxy S24, let’s dive into the advanced features and settings that will take your smartphone experience to the next level.
One of the standout features of the Galaxy S24 is its facial recognition technology. By setting up facial recognition, you can unlock your smartphone with just a glance. This feature not only enhances security but also provides a convenient way to access your device without having to enter a passcode.
Another advanced feature of the Galaxy S24 is its wireless charging capabilities. With compatible wireless charging pads, you can simply place your smartphone on the pad and watch it charge without the need for any cables. This feature is not only convenient but also ensures that your smartphone stays powered up throughout the day.
The Galaxy S24 also comes with a range of customization options. From changing the theme and wallpaper to customizing the app icons, you can personalize your smartphone to reflect your style and preferences. The owner’s manual will guide you through these customization options, allowing you to create a truly unique smartphone experience.
Tips and tricks for maximizing your Galaxy S24 experience
To wrap up this ultimate guide to the Galaxy S24 owners manual, let’s explore some tips and tricks that will help you maximize your smartphone experience.
Customize your Edge Panel: The Galaxy S24 comes with a handy Edge Panel that provides quick access to your favorite apps, contacts, and tools. Take advantage of this feature by customizing it to include the apps and shortcuts you use most frequently.
Use Multi Window for multitasking: The Multi Window feature allows you to run two apps simultaneously on your Galaxy S24. This is particularly useful when you need to reference information from one app while working on another. To activate Multi Window, simply swipe from the right edge of the screen to access the Edge Panel and select the Multi Window option.
Enable Dark Mode for better battery life: Dark Mode not only gives your smartphone a sleek look but also helps conserve battery life, especially on devices with OLED displays like the Galaxy S24. To enable Dark Mode, go to Settings, tap on Display, and select Dark Mode. You can also schedule Dark Mode to automatically activate during specific times of the day.
Conclusion
In conclusion, the Samsung S24 user manual is an invaluable resource for any owner of this incredible smartphone. It provides you with all the information you need to navigate through the features and settings, troubleshoot common issues, and maximize your smartphone experience.
By understanding the benefits of having a comprehensive manual, exploring the features and specifications of the Galaxy S24, and delving into the advanced features and settings, you will be able to unleash the full potential of your smartphone.
So, take some time to dive into the owner’s manual, experiment with the tips and tricks, and make the most of your Galaxy S24. With this guide by your side, you are well on your way to enjoying a seamless smartphone experience. If you want to have a user manual for Samsung Galaxy S24 Ultra, you can get free from this website.
In today’s digital age, we all love to capture our precious moments in the form of photos and videos. Samsung smartphones are known for their excellent camera quality, and we often click pictures on our Samsung phones. However, sometimes we need to transfer these photos to our computers for editing, sharing, or storage purposes. In this blog post, we will discuss various methods to transfer photos from Samsung Phone to Computer.
Methods to transfer photos from Samsung phone to computer
One of the easiest ways to transfer photos from Samsung phones to computer is by using a USB cable. Here are the steps to transfer photos using a USB cable:
Connect your Samsung phone to your computer using the USB cable supplied with your device.
If prompted, unlock your phone and allow your computer to access your phone’s data.
On your computer, open File Explorer and look for your Samsung phone under “Devices and drives.”
Click on your phone to open it and navigate to the folder where your photos are stored.
Select the photos you want to transfer and copy them to your computer.
Method 2: Transfer photos using the Samsung Smart Switch
Samsung Smart Switch is a free app that allows you to transfer data, including photos, from your old device to a new one. Here are the steps to transfer photos using the Samsung Smart Switch:
Download and install the Samsung Smart Switch on your computer.
Connect your Samsung phone to your computer using the USB cable supplied with your device.
Open the Samsung Smart Switch on your computer and select “Backup.”
Select the data you want to transfer, including photos, and click “Backup.”
Once the backup is complete, disconnect your Samsung phone from your computer and connect your new device.
Open Samsung Smart Switch on your new device and select “Restore.”
Select the backup file you created earlier and click “Restore.”
Method 3: Transfer photos using the Samsung Cloud
If your Samsung phone is compatible with Samsung Cloud, you can use it to back up all your device data, including photos. Here are the steps to transfer photos using Samsung Cloud:
Open the Gallery app on your Samsung phone.
Select the photos you want to back up and tap the “Share” icon.
Select “Samsung Cloud” as the sharing option.
Once the pictures are uploaded, you can get to them on your computer by logging in to your Samsung Cloud account.
Conclusion
Transferring photos from Samsung phones to computers is a simple process that can be done using various methods. In this blog post, we discussed three common methods to transfer photos from Samsung phones to computers: using a USB cable, using the Samsung Smart Switch, and using the Samsung Cloud.
We hope this blog post was helpful in guiding you through the process of transferring photos from your Samsung phone to your computer.
Are you excited about getting your hands on the brand new Apple iPhone 15 Pro? We bet you can’t wait to explore all the fantastic features and unleash its true potential! Well, guess what? We’re here to guide you through the magical world of the iPhone 15 Pro user guide!
This post is your one-stop destination to find out where to download the user guide for iPhone 15 Pro and why it’s crucial to give it a good read. Whether you’re a tech-savvy millennial or a tech-curious senior, this guide is tailored just for you!
Where to download the iPhone 15 Pro user guide
First things first, let’s talk about where you can get your hands on the iPhone 15 Pro user guide. Apple has made it super easy for you to access the digital version of the manual. Simply head over to the official Apple website and navigate to the iPhone 15 Pro support page.
There you’ll find a treasure trove of resources, including the user guide in PDF format. Don’t worry; it won’t take much of your precious time to download it, and voilà! It’s all yours to explore and learn from.
Why you need to read the user guide
Now, you might be wondering, “Why should I bother reading the user guide when I can figure things out on my own?” Well, hold on to your hats, because the user guide is like a secret key to unlocking the full potential of your iPhone 15 Pro! Sure, you might be able to make calls, take photos, and play around with some apps without it.
But believe us when we say that this guide holds a treasure trove of tips, tricks, and shortcuts that’ll blow your mind!
The iPhone 15 Pro is a technological monster, but you need to know how to operate it. The user guide will walk you through your phone’s revolutionary features and functions, maximizing every pixel.
Whether it’s learning about the enhanced camera features, getting the hang of the new intuitive gestures, or mastering the art of multitasking, this guide has got your back!
Content and inside of the manual
Alright, let’s crack open the iPhone 15 user manual and take a peek at the goodies inside! Once you flip through the virtual pages, you’ll be greeted by a delightful blend of colorful visuals, concise explanations, and easy-to-follow step-by-step instructions. Apple knows how to make tech stuff look sleek and user-friendly, and the user guide is no exception!
You’ll find sections dedicated to each aspect of the iPhone 15 Pro, covering everything from the basics of setting up your phone to more advanced features that’ll make you feel like a tech wizard. Worried about how to transfer data from your old iPhone to the new one? Don’t fret; the user guide has got you covered.
Want to customize your home screen and widgets to match your personality? They’ll walk you through it!
Benefits of reading the iPhone 15 Pro user guide
Alright, let’s talk about the fantastic benefits of investing some time in reading the user guide. First off, you’ll save yourself from unnecessary frustration and confusion. Imagine trying to figure out a feature, but you keep missing out on its full potential because you didn’t know it existed!
The user guide will show you the way and help you make the most of your iPhone 15 Pro.
Not only that, but the guide will also boost your confidence in using your new device. You’ll be navigating like a pro and showing off your iPhone skills to friends and family in no time! Plus, discovering new functionalities can be exciting and may even inspire you to use your phone in ways you never thought possible.
In the long run, reading the user guide will ensure you get the best return on your investment. You’ve splurged on a top-of-the-line device; now it’s time to enjoy every little gem it has to offer. The user guide will keep you updated on any software updates and improvements, too, so you’re always ahead of the game!
Conclusion
Well, there you have it, folks! The Apple iPhone 15 Pro Max user guide is your ultimate companion on this tech-filled adventure. From its easy accessibility to the wealth of knowledge it contains, there’s no reason not to give it a good read.
Remember, whether you’re a tech-savvy youngster or a curious senior, this guide is designed for everyone to enjoy and make the most out of their iPhone 15 Pro.
So, what are you waiting for? Grab that iPhone 15 Pro and dive into the world of possibilities with the user guide as your trusty sidekick. Happy exploring, and may your iPhone 15 Pro experience be nothing short of extraordinary!
Looking to get your hands on the Samsung Flip 5 manual PDF? Well, you’re in luck! In this step-by-step guide, we’ll walk you through the process of finding and downloading the manual for this innovative device. We know you need a detailed handbook to get the most out of your Samsung Galaxy Z Flip 5. From setting up your device to navigating the various settings and functions, we’ve got you covered.
Why do you need the Samsung Flip 5 manual?
Samsung Flip 5 owners need the handbook. The guidebook lets you use all the Samsung Galaxy Z Flip 5’s capabilities. It provides detailed instructions, tips, and troubleshooting solutions, allowing you to troubleshoot issues, customize your device, and maximize its potential.
Understanding how to operate your Samsung Flip 5 effectively is vital in order to make the most of its innovative features. The manual offers step-by-step instructions on how to set up your device, navigate the user interface, access various settings, and explore the wide range of functions it offers.
By familiarizing yourself with the manual, you can confidently use your Samsung Flip 5 to its fullest potential, whether it’s for work, entertainment, or communication purposes.
Where can I find the Samsung Flip 5 user manual PDF?
To find the Samsung Flip 5 user manual PDF, follow the step-by-step instructions below:
Step 1: Visit the Samsung website
Start by opening your preferred web browser and navigating to the official Samsung website. The website provides a wealth of information and resources for Samsung device owners.
Step 2: Navigate to the Support section
Once you’re on the Samsung website, look for the “Support” or “Product Support” section. This section is specifically designed to provide users with access to various manuals, guides, FAQs, and other support resources.
Step 3: Enter the model number
In the Support section, you will find a search bar or a drop-down menu where you can enter or select the model number of your Samsung Flip 5. The model number is usually located on the backside or on the packaging of your device. Enter the correct model number to ensure you find the specific manual for your device.
Step 4: Find and download the manual PDF
After entering the model number, click on the “Search” or “Find” button. The website will display a list of results related to your device model. Look for the manual specifically labeled as the Samsung Flip 5 manual or user guide. Click on the manual to open it in PDF format. From there, you can download the manual to your device for future reference.
Alternative sources for the manual
While the official Samsung website is the most reliable source for finding the Samsung Flip 5 user guide, there are alternative sources you can explore. These sources include third-party websites like oneuiguide.com that provide user manual for your phone.
However, it’s important to exercise caution and verify the authenticity of the manual before downloading it from these sources. Stick to reputable websites and platforms that have a good track record of providing accurate and reliable information.
Tips for using the Samsung Flip 5 manual effectively
Now that you have access to the Samsung Flip 5 user manual, here are some tips to help you make the most of it:
Read the manual thoroughly. Take the time to read through the entire manual to familiarize yourself with all the features and functions of your Samsung Flip 5. This will ensure that you have a comprehensive understanding of how to use your device effectively.
Use the search function: The manual is likely to be quite extensive, covering a wide range of topics. If you’re looking for specific information or instructions, use the search function within the PDF reader to quickly find what you need.
Bookmark important sections: To make it easier to find frequently referenced information, consider bookmarking important sections or pages within the manual. This way, you can quickly access the information you need without having to search through the entire manual.
Take advantage of visual aids: The Samsung Flip 5 manual may include diagrams, illustrations, and screenshots to help you better understand various concepts and instructions. Pay close attention to these visual aids, as they can often provide valuable insights and make the learning process easier.
Refer to the troubleshooting section: If you encounter any issues or problems with your Samsung Flip 5, refer to the troubleshooting section of the manual. It will provide you with step-by-step instructions on how to resolve common issues or errors.
Following these guidelines, you may utilize the Flip 5 handbook to improve your user experience and fix issues.
Conclusion
Finally, the Samsung Flip 5 handbook PDF is essential for optimizing your device. The handbook contains thorough instructions, suggestions, and troubleshooting to help you use your Samsung Galaxy Z Flip 5. This article’s step-by-step tutorial will help you discover and download the handbook from Samsung’s website.
Remember to use alternative sources with caution and follow the tips provided to make the most of the manual. With the Samsung Flip 5 manual, you can maximize your device’s capabilities and enjoy a smooth user experience.
Welcome, tech-savvy ladies, to this exciting guide on how to get your hands on the comprehensive Nothing Phone 2 user guide for free! Whether you’re a beginner or a tech enthusiast, this user guide will empower you to make the most of your new gadget. So, let’s dive in and discover the wonders of the Nothing Phone 2 user guide together!
Nothing Phone 2 User Guide for Beginners
Are you new to the world of Nothing Phone 2? Fear not, my friend! The user guide is designed with beginners in mind, providing a seamless and user-friendly experience. From the moment you lay your eyes on the guide, you’ll be greeted with clear and concise instructions that will walk you through the various features and functions of your brand-new Nothing Phone 2.
Discover the tips and tricks that will unleash the full potential of your smartphone. From setting up your device and personalizing it to your liking to exploring the cutting-edge camera features and mastering the art of multitasking, this user guide has got you covered. Say goodbye to feeling overwhelmed and hello to becoming a confident Nothing Phone 2 user!
Where to Download the Nothing Phone 2 User Guide
Now, you may be wondering, “Where can I get my hands on this invaluable user guide?” Well, my tech-savvy friend, you’re in luck! Nothing understands the importance of a well-informed user and has made the user guide easily accessible for everyone. Simply head over to the official Nothing website and navigate to the support section.
Once you’re there, you’ll find a treasure trove of resources, including the user guide for your beloved Nothing Phone 2. Download it as a PDF or browse it directly on your device for instant access to a world of knowledge. It’s like having a personal tech guru at your fingertips, ready to guide you through any hurdle you may encounter on your Nothing Phone 2 journey.
Why You Need to Read the Guide
You may ask why reading the user guide is vital when you can figure things out yourself. Dear reader, the user guide is a goldmine of information that can save you time, trouble, and money. It’s like having a secret manual that unveils all the hidden features and possibilities of your Nothing Phone 2.
By reading the guide, you’ll discover shortcuts, tips, and hidden gems that will enhance your overall smartphone experience. From extending your battery life to optimizing your device’s performance, the user guide holds the keys to unlocking the full potential of your Nothing Phone 2. So, why settle for being an average user when you can become a Nothing Phone 2 pro?
Benefits of Reading the Manual Guide
Still not convinced about the wonders of the Nothing Phone 2 user guide? Let me share with you some of the incredible benefits you’ll reap by dedicating some time to reading it. Firstly, you’ll gain a deeper understanding of your device’s capabilities, allowing you to make the most of its cutting-edge features and functionalities.
Second, the user guide will help you fix typical difficulties without contacting customer support or searching online. You’ll become a self-reliant tech expert equipped to handle any challenge by following the guide.
Finally, reading the user guide will improve your experience and reveal new features. The hidden jewels in those pages will make your Nothing Phone 2 experience unforgettable.
The wireless gaming mouse is a good option for gamers who are looking for a lightweight and comfortable device. The Logitech Powerplay system trickles charges your mouse while you play, ensuring it never runs out of power. Its rubberized wheel also reduces its weight, making it one of the lightest gaming mice available.
Are wireless mouses good for gaming?
When buying a wireless gaming mouse, there are three main criteria to consider: size, connectivity, and price. Size is probably the easiest to decide upon, as most people prefer a larger mouse for gaming. Others, on the other hand, may prefer a smaller mouse. A wireless gaming mouse must also be compatible with the operating system of your computer.
A wireless gaming mouse should have 2.4GHz connectivity to ensure low input lag. The 2.4GHz connection is faster than Bluetooth. It also helps reduce latency. A wireless gaming mouse should also have a good battery life. Although wireless mice are becoming more popular, you should keep in mind that some have fewer features than others.
A wireless gaming mouse should also be light enough to be comfortable to use. It should weigh less than 80 grams. It should be able to last for weeks between charges.
Which wireless mouse is best for gaming?
The best wireless gaming mice use a 2.4GHz or Bluetooth connection, allowing you to connect with your computer wirelessly. A wireless mouse also conserves battery power. Some models use rechargeable batteries, while others use disposable AAs or AAAs. Rechargeable mice usually have a range of about 100 to 200 hours.
Wireless mice are usually lighter than corded mice, making them more comfortable for long gaming sessions. The weight of wireless gaming mice is generally proportional to the number of buttons, and a lighter mouse will allow you to play games for a longer time. For example, a mouse with six buttons will be sufficient for most FPS games. But if you play games that require a lot of commands, you may want a mouse with more buttons.
Wireless gaming mice use a low-latency 2.4GHz wireless connection to communicate with the computer. This connection is better for playing games but drains the battery faster than Bluetooth. A wireless gaming mouse will also use a USB dongle for connecting to a computer.
Is a wireless mouse better than a wired mouse?
While gaming mice with a wireless connection are generally better, some mice aren’t as responsive as their wired counterparts. Latency is often a factor, especially if the mouse is made of cheaper materials or features low-quality switches. Fortunately, technology has evolved to eliminate latency, and many top mice now match the speed of wired mice.
Whether a wireless or wired mouse is better for gaming relies on your preferences and your budget. Wireless mice offer more portability, but they often cost more than their wired counterparts. Additionally, they often require an external battery that can last up to 50 hours. Another disadvantage of wireless mice is the risk of signal interference. Moreover, wireless mice can lag, skipping inputs, and not registering clicks. A wired mouse is more secure and clean, and is better for traveling.
If you’re a serious gamer, a wired gaming mouse is better. A wired gaming mouse has zero lag times, and its response time is quick and smooth. This is why wired mice are preferred by professional and casual gamers around the world. However, if you’re using the mouse for everyday use, a wireless mouse is better.
What is the best gaming mouse wireless?
There are several factors to consider when choosing a wireless gaming mouse. For one, the shape should be comfortable and fit most hands. Another consideration is the type of sensor. Some mice have multiple sensors, while others are only capable of one. You should also consider the size and weight of the mouse.
A good gaming mouse can help you win more games than ever. They should feel great in your hand and track accurately. They should also be comfortable to hold, which will help you work faster. However, you should remember that a gaming mouse is different from a productivity mouse. The latter is meant for gaming, while the former is designed to increase productivity.
Wireless gaming mice have advanced over the past decade and now offer performance comparable to the best-wired mice. The old days of dropped signals and lag are a thing of the past. There are a few brands that produce high-quality wireless gaming mice, but not all of them are created equal. Fortunately, Tom’s Guide has tested and reviewed dozens of wireless gaming mice, so you can be confident in the product you buy.
If you’re planning to buy an iPhone 14, you should look for the iPhone 14 owners manual for your new phone. These manual will teach you how to use the devices and the features they offer. For example, they will tell you how to take screenshots and record videos. You’ll also find tips and tricks for operating your device that will help you get the most out of it.
Why You Should Download the iPhone 14 owners manual
If you have just purchased an iPhone 14 and want to learn how to use it, you should download the iPhone 14 user manual. This manual has comprehensive instructions, safety guidelines, and regulatory certification information.
It also includes contact information for the Apple customer support. Using this manual will make sure that you get the most out of your phone.
The user manual for the iPhone 14 can be downloaded using your computer’s web browser. Make sure that you have a strong Internet connection.
Otherwise, you’ll have to purchase an external data plan to get the manual. Once you’ve downloaded the manual, open it on your PC or mobile device. You’ll need a web browser that can handle PDF files.
Apple also provides a downloadable PDF of the iPhone 14 user manual. This manual covers all the new features of the smartphone. It’s the best way to get to know the phone’s functions. It also includes helpful tips and apps that can make your life easier. You can find the manual at Apple’s official website.
The iPhone 14 has several upgraded features. It has a more powerful camera and a longer battery life. The device is available in four variants, with the latest variant costing more but offering an extra 256GB of storage.
Where to get user guide for iPhone 14
If you’re not familiar with how to use your iPhone, a user guide is a great resource. Not only can you find detailed instructions but also learn about new features, regulatory certifications, and safety and handling. You can also contact Apple customer support if you have any questions. To download the iPhone 14 user guide, visit the Apple website or download it to your mobile phone.
The iPhone user guide can be downloaded from Apple’s website or Apple Books app. First, you need to install Apple Books on your iPhone. Then, follow the instructions to download the guide. Make sure you select the appropriate authentication method. After that, you can tap the link to download the guide. You may need to enter your Apple ID and password to download the guide.
The iPhone 14 has several improvements. It has a wider screen, a faster processor, and a better camera. It also has more storage space and a longer battery life. There are four different variants, with the newest having an extra 256GB of memory. Before getting your iPhone 14, make sure you check out the user guide.
If you’re an existing iPhone user, the iPhone user guide is a great place to start. It will walk you through setting up the new device, installing apps, and more. You’ll be able to quickly access important information, such as setting up Apple ID and iMessage. You can even find a copy of the manual online and print it out!
Having a Samsung Galaxy S23 plus operating instructions is a great way to make the most of your phone’s features. Not only will it walk you through the features of your phone, but it will also provide tips for caring for it. It will also include troubleshooting guides so you can fix issues on the spot.
Of course, you can also contact Samsung customer support if you have any questions or issues. But, the good thing is that you can find a manual for your phone online.
Where to get the Samsung Galaxy S23 Plus operating instructions
If you are a new user of Samsung Galaxy S23, you may be wondering how to operate your new smartphone. A Samsung S23 user guide can help you get the most out of your new phone, as it provides tips for using the features and functions.
It can also help you fix problems with the device, and you may even need to adjust some settings. To download the Samsung Galaxy S23 plus operating instructions, you can visit Samsung’s website.
A user guide is essential for all new users of Samsung Galaxy S23 phones. Not only will it teach you how to use the phone, it will also help you make the most of its many features. In the manual, you’ll learn how to insert your SIM card, use Wi-Fi and access email accounts. It will also show you how to set up your phone’s security and settings, so you can use it with confidence.
The latest version of the Galaxy S series, the Samsung Galaxy S23, comes with many upgrades. The main camera now has a 108-megapixel sensor and three-12MP-front-facing.
The front-facing cameras include an ultra-wide lens and periscope camera. Another new feature in this phone is a detail enhancer.
The Samsung S23 user manual is available for download from the company’s website. This handy guide explains several features of the phone, from how to insert the SIM card to setting up the Wi-Fi network.
It also provides helpful information for transferring data and setting up your email account. It also includes tips for securing the phone so that it’s protected against theft. With the manual, you can learn how to use the phone safely and efficiently.
Download the manual for free from the official Samsung website. The manual contains detailed information on your phone’s features and specifications. It also comes with helpful tips and tutorials.
Getting the right manual is critical to maximizing the functionality of your Galaxy S23. Luckily, this document can be downloaded as a PDF file, enabling you to view, print, and save it anywhere. If you are a new user to the Galaxy S23, this guide is an invaluable resource.
A Samsung Galaxy S23 Ultra operating instructions will show you how to use your phone and get the most out of it. You’ll be able to easily operate various functions, learn how to care for it, and find troubleshooting guides.
If you have a problem, you can use this guide as a guide to fix it without spending a fortune on professional help. Alternatively, you can call up Samsung’s customer support service.
If you are looking for a Google Pixel 6a user guide, you’ve come to the right place. This manual covers common tasks, troubleshooting, and even a factory reset. The guide is available on here. Read through the manual carefully to get the most out of your phone! Here are some of the most important troubleshooting tips.
Pixel 6a user guide PDF for beginners
The Google Pixel 6a user guide PDF is available online. This downloadable guide includes the model number, hardware diagram, and full specifications for this smartphone. It will also teach you how to turn the phone on and transfer data to it. It will even show you how to switch from iMessage to Message.
The manual will help you navigate your new device and make the most of its capabilities. The manual is also available in other languages.
If you have any problems using your device, the user guide will tell you how to fix the issue. The guide also includes information on how to perform a factory reset and troubleshoot other common problems. Using a guide will save you a lot of time.
Regardless of whether you’re a newbie or an experienced user, you can be sure that the manual will be helpful. Once you have the guide, you can use it to learn everything there is to know about your new phone.
The Google Pixel 6 user guide PDF is essential for any new smartphone owner. The manual contains tips on common problems, troubleshooting steps, and more. It can also help you perform a factory reset on your new device.
You can download the PDF from the manufacturer’s website. It will be in pdf format, so you’ll need an Adobe reader to view it. Once you have the manual, you can follow the steps outlined in it to learn about the phone’s features and capabilities.
Content of the manual
If you’re new to Google’s new smartphone line, the user guide for Google Pixel 7 can help you navigate through the many features and functions. The manual will walk you through common tasks, including troubleshooting and factory resets.
You can find the guide on the manufacturer’s website, and it’s available in several languages, including English. However, if you’d like to read in a different language, you’ll have to download Adobe reader.
The repair manual for Google Pixel 6a is only available in French, so if you’re not fluent in English, this might not be the best choice. Thankfully, Google partnered with iFixit to provide genuine repair parts and a user guide.
The instructions manual is remarkably similar to the service and internal documentation for the Pixel 6 Pro but is more geared toward the consumer. It contains detailed troubleshooting instructions and illustrations. The manual also discusses the differences between the mmWave and sub-6GHz variants.
If you’re a newcomer to Google’s phones, you can download Pixel 6a user guide for for free. The manual will help you with basic tasks like turning the phone on and off, switching the phone’s volume, and switching from iMessage to Message.
It also includes helpful tips and tricks for using the device. This guide is a useful reference tool for learning more about Google’s new smartphone line.
If you’re new to Apple’s devices, iPhone 13 Pro user manual is a great resource to learn how to use your new iPhone. The guides are available online or by swiping down from the Home Screen. If you have an older model of iPhone, you can download the manual from Apple website and print it out yourself or take it to a copy shop. You can also create a shortcut to your user guide and save it as a shortcut in your home screen.
Content of the iPhone 13 Pro user manual
The iPhone 13 Pro user manual is a great source of information for beginners. You can also find tips for troubleshooting issues. Many problems can be solved with the help of an iPhone manual. A well-written one will show you the best ways to fix your problems.
However, the user manual isn’t just about hardware and software. It’s written for the iOS 15 operating system, and will also be relevant for iPhones running iOS 14 or iOS 15.
Before you begin learning how to use your iPhone 13 Pro, make sure that it is fully charged. Press the power button and follow the on-screen instructions. If you’re a new user, you may want to consult a user manual for iPhone.
Once you’re comfortable using the device, you can get a quick guide from Apple. If you need to make any adjustments, the user manual will be of great assistance.
There are a few steps you should know about before using your iPhone. The first step is to press the power and wake buttons simultaneously.
Then, follow the instructions to install apps, games, movies, and music.
The iPhone also has a built-in app for Face ID. The manual will explain how to use these features. There are more steps in setting up your iPhone. You’ll need to learn how to setup a few basic features.
Conclusion
After you’ve installed the software and apps, you should learn how to operate your new iPhone with ease. The iPhone 13 Pro user manual will also cover the functions of your iPhone’s camera and other built-in applications. The iPhone 13 Pro is a powerful device that can do great things for your business. You can even use it to make payments with friends and family! So, make the most of your iPhone and start working on your new projects.
If you’re unsure how to use your new Samsung Galaxy A72, you should download a user guide to help you. These manuals are very helpful for first-time users and even for technicians. If you can’t find a manual in the device’s box, you can always look it up online. It will also be easier to follow the instructions when you have the device at your fingertips.
Where to download Samsung Galaxy A72 user guide
If you’re looking for a comprehensive manual for your new Samsung Galaxy A72, you can download the PDF version of the manual. It will take a little while to load, so it’s best to wait until it’s finished downloading. Once you’ve downloaded the PDF file, you can follow the instructions to set up your device. Once you’ve completed this step, you can go ahead and install your new device.
The manual can also be downloaded from this website. It’s important to ensure that the manual you’re downloading is genuine. If you download something that’s not genuine, you can end up getting a virus on your computer. You should also read the manual thoroughly to learn all about the features of your new device. You’ll have a better understanding of how to use your new Samsung Galaxy A72 phone.
Why you need to read the manual book?
If you’re a first-time owner, you should always check your manual for dummies. Using a manual will help you learn about the different features and operations of your new device. It will teach you how to set up your Samsung account and use NFC to make payments. It will also teach you about the settings, which will be essential for your daily life. If you’re a beginner, it’s always better to start from scratch than to learn everything on your own.
If you’re a new user, it’s important to read a manual before purchasing a new smartphone. This will help you understand all of its features. You’ll also learn how to use the Game Launcher, change the brightness of your screen, and apply beauty effects. You’ll also learn how to use a USB cable to transfer data and add and manage your Samsung Account. You’ll have the information you need to use your new phone effectively.
A user guide can help you navigate the complicated settings of a Samsung Galaxy A72. You’ll find it in English and Arabic. The manuals also contain useful information on how to set up the device. For example, the guide will help you understand the memory card tray. It’ll help you with overheating. It’s also important to learn about the battery life of your device. It will also help you use the camera.
In case you are looking for an easy way to understand your new Samsung Galaxy A51, you should look through its user manual. This manual is filled with helpful tips and tricks, as well as technical information about your new phone.
You can also refer to its highlight, which features you should know about. However, if you don’t have access to the manual, you can always use the step-by-step instructions provided below.
Where to download Samsung Galaxy A51 user manual
The Samsung Galaxy A51 user manual is available in PDF format. If you don’t have a PDF reader, you can download a copy of the manual. It has information on various functions of the phone. This manual can help you understand how to use your phone.
There are also guides for new users. There are several guides that can help you in using your smartphone. You should read the user manual carefully. If you don’t understand it, you might want to seek out the right Samsung Galaxy A51 software for your needs.
The Galaxy A51 user manual is packed with technical information that you should know about your new device.
This includes settings for changing app icons and widgets. You can also learn how to change the screen saver and lock screen. Lastly, you should read the subchapter on Connections, which provides a quick look at the various ways you can use your new phone. The user manual is also available for free.
The manual covers important information about the Samsung Galaxy A51. You should learn about its camera features and the different shooting modes.
It also covers features like split screen mode and Game Launcher. You should also learn how to connect to Wi-Fi networks, adjust the brightness of the display, and change themes. If you’re not familiar with the manual, you can download it from the manufacturer’s website. It’s not difficult to find.
Content of the manual
The Samsung Galaxy A51 user manual also covers editing features. It includes a list of tools for photo editing. You’ll also find a chapter on the Samsung apps.
Once you have the manual, you’ll have a better understanding of your new phone’s features. If you’re confused about any aspect of the device, it will help you choose a way to use it. This manual can help you make the most of your new phone.
The Samsung Galaxy A51 user manual will help you understand and utilize the many features of your new phone. You’ll be amazed by all the different functions and features. You’ll also get a better understanding of the phone’s layout and its hardware buttons.
The manual also contains important information regarding battery charging and reducing battery usage. In addition to the manual, you can also look for other useful information about your new device.
The Samsung Galaxy S21 User Manual is a comprehensive guide that explains the features and workings of the new smartphone. The manual is not only comprehensive but also easy to understand, which is why you should always read it before starting to use the device.
The Samsung S21 manual book is available in traditional Chinese, which makes it a great choice for users who prefer to read the documents in their own language. Moreover, the manual will be helpful for users who purchase the smartphone from the Hong Kong or Taiwan markets.
Where to download Samsung Galaxy S21 user manual
Before you start using your Samsung Galaxy S21, you should first read the user manual. You can find this manual on the official website of the manufacturer.
It will help you understand some basic points and prevent you from accidentally adjusting some settings. Incorrect settings may result in a problem that will take a long time to recover and may damage the functionality of your phone. Therefore, reading the manual is a must for any new owner of the device.
The PDF version of the manual is available on the official Samsung website. It can be viewed on a laptop or phone, but you must make sure your device is connected to the internet during the downloading process.
Once downloaded, open the user manual using Adobe Reader. The manual is packed with useful information and is easy to read for beginners. It provides information on the apps, features, connectivity, security, and navigation on the Samsung Galaxy S21.
The Samsung Galaxy S21 user guide is available in Arabic and English languages. The English version is available for users who purchased the handset in the Middle East.
The Chinese language version is known as Zheng Ti Zhong Wen and is the official user guide for Galaxy S21 sold in the Taiwan market. If you buy the phone from the latter, you can also find the user guide in Chinese. It is an official version of Android 11 and it comes in both English and Chinese languages.
Why you need to read this user guide?
To understand the functions and working of the Samsung Galaxy S21, it is necessary to read the user manual. The manual includes detailed information about the phone’s functions and the features it has. Furthermore, the user manual includes a troubleshooting section.
This section will assist users in fixing any issues that may arise. You can download the Samsung Galaxy S21 User Manual from two sources. You can also download the manual by scanning the QR code on the phone itself.
The user manual for Samsung S21 5G is an important resource for all Samsung Galaxy S21 owners. It contains tips, and instructions for using the phone, as well as specifications. The user manual should be available from an official source or from an appropriate website.
If the user manual is not available in English, it is available in the Spanish language. It is a helpful guide for users of any language. The guide will be able to answer any questions regarding the phone’s functions and features.
The iPad Pro user manual is easy to download from Apple’s website. The manual is also available for offline reading. In addition to the printed manual, users can download the free iBook version of the iPad Pro user guide.
The guide will walk you through all of the features and functions of the new tablet. Whether you need help setting up your iPad or learning about the latest features, the iPad Pro owner’s book can be helpful.
How go i get iPad Pro user manual
The user manual includes information on setting the language and region, taking screenshots, setting live photos as wallpaper, organizing apps in folders, removing apps, monitoring battery, and Siri. If you don’t have an iPad Pro user guide, you can download the one from Apple’s website.
Once you’ve downloaded it, you can view it on your iPad. It’s also available on your device. This guide is a great reference, so you’ll want to keep it handy.
The iPad Pro comes with an English user manual, but there are a few other languages as well. There’s also a Spanish version for those who don’t speak English. If you don’t like reading books on the iPad, you can read your user guide in English. There are other options for downloading the iPad Pro user guide. Fortunately, Apple doesn’t charge for a printed version, so you don’t have to worry about getting lost.
When you need help with your iPad, the Apple support website has the answers. In addition to the user guide, Apple also offers a dedicated YouTube channel for all things Apple. If you’re not comfortable reading manuals online, you can download and print a PDF copy from the Apple website. And of course, you can find the iPad Pro user guide on the company’s website! If you’re stuck, don’t worry. The iPad user manual is a great source of information and is an excellent way to become familiar with your device.
Conttent of the manual for iPad
After completing your iPad setup, you’ll see the “Hello” screen. You’ll then find the iBooks app. It looks like a white book over an orange background. It opens straight into the book. The iBooks app also has controls and a search button in the bottom right corner. If you want to search for the manual, you can type in “iPad” and hit enter. The app will open the iPad manual in your home page.
The iPad user manual is based on the software of the device. This software is also known as the iPadOS. Every year, Apple releases major updates of its software. If you have an older iPad, it may not be compatible with the latest update. If you are not sure of the iOS version of your iPad, you can check the version in Settings. Once you’ve installed the latest iOS update, you’ll be ready to start using your iPad.
You can customize the way you receive voicemail alerts on your iPhone by editing the settings for voicemail. You can also save your recorded message and return to it anytime you want. You can also make a default greeting and password protect your recording. If you have trouble finding the option, you can use the search function to find it. Here are some tips for customizing your iPhone voicemail settings. You can create a voicemail message to leave for your friends and family.
How to set up voicemail on iPhone
To setup your iPhone’s voicemail, you need to tap the voicemail icon at the lower right corner of the screen. Tap the phone icon to access your voicemail, and follow the instructions that appear on screen. When prompted to enter a password, type four to 15 digits and press OK.
Once you’ve entered a strong password, you’re ready to set up your voicemail service. Once your new voicemail app has been installed, you’re ready to begin using it.
If the iPhone voicemail settings are preventing you from receiving messages, you can reset your network settings. This will restore your iPhone to its default settings. Afterwards, you should be able to check your voicemail and phone connection.
If you have an active connection, you can call the phone and check your voicemail, or reset your network settings. If you’re still not able to get a satisfactory response, contact Apple’s support team.
Next, you can change the voicemail password on your iPhone. To change your password, select the option in the upper left corner of your screen. Click on the “Set up now” button to choose your new password.
Once you’ve entered your new password, select “Done.” Once you’ve entered your new password, your iPhone will automatically begin receiving voicemail. If you’re not satisfied with the settings, you can always try another one.
Checking the steps
Before you can activate the iPhone’s voicemail, you need to make sure that your iPhone is connected to the cellular network. If you can’t receive calls, your iPhone will not accept your voicemail.
Its carrier may be dealing with outages, but it should still be able to receive messages. Once you’ve activated the phone, you can turn on the features of your voicemail. Your iPhone will be able to receive voicemail from other phones on the same network.
Once you’ve set up your iPhone voicemail, you can customize it to suit your needs. You can choose to keep or delete the messages you’ve deleted. After you’ve made these changes, you can record your own voicemail greeting and play your current greeting.
To set up the iPhone’s audio mail, you can use the “Set up now” button in your Phone app to make phone calls. Then, open the “Set up now” page and choose your new phone mail password.
If you have recently purchased a Samsung Galaxy S22 Ultra smartphone, the best place to start is with a user guide. It’s a good idea to read a guide before you begin, but if you’re not sure how to do it, here are some tips and tricks to get you started. The Samsung Galaxy S22 Ultra user guide user guide will show you the basic controls of your phone and help you configure settings. It also includes helpful tips and tricks.
Why you should to read Galaxy S22 Ultra user guide
A user guide is essential for any new phone, but it’s particularly important for Samsung’s latest flagship model. A user guide will tell you how to insert a SIM card, connect to Wi-Fi, set up email accounts, and more. It will also show you how to secure your phone.
In this way, you can use it to do whatever you want. Depending on your needs and preferences, you can choose the right one for you.
Before you begin using your new Galaxy S22 Ultra, it’s important to read a user guide. It’s not only important for security, but for basic maintenance of the device. It will show you how to set up your account, use the features, and much more.
It can also help you insert a SIM card and connect to Wi-Fi. This is especially important for those who are new to using a smartphone. It will also explain how to set up an email account and secure your phone’s security features.
Where to get the user guide for my new phone
If you’re looking for a user guide, you’ve come to the right place. The Samsung Galaxy S22 Ultra can be download at this website. It’s a great tool for new users to learn more about their phone. If you’re a new user, a good user guide can help you get started. Just make sure that you take the time to read it! You’ll find it invaluable once you’ve used it for a while.
It’s important to read the user guide and watch videos before you begin using your phone. You may also want to consider buying a Samsung Galaxy S22 Ultra case for protection against damage.
A Samsung Galaxy S22 user guide will help you get the most out of your new device. It will also explain how to use the S Pen, which is built into the phone. This is a useful tool when it comes to using your new device.
A good user guide will be a valuable tool for people who have recently purchased a Samsung Galaxy S22 Ultra. This document will give you information about how to use the phone. You should also know what to expect from the camera.
In the case of the main camera, the 108MP sensor will be a great upgrade from the 12MP in the Galaxy S21 Ultra. The second camera will be a 10MP telephoto lens.
The Samsung S22 user manual is a great resource for learning how to use your new phone. You’ll learn how to navigate the basic menu, use the applications, and more. You’ll also find tips for maintaining your new phone. The user manual will even include troubleshooting guides.
These will help you find a solution to a problem quickly and easily. You can also download the manual to your computer or print it out for future reference.
The manual is also available in Arabic and English, which is helpful for those who don’t speak the native languages. This document will also show you how to use the phone’s various features.
You’ll also be able to see what buttons operate which functions. The Samsung S22 is a great smartphone for everyday use. There are plenty of features to learn about, so you’ll be able to use it easily.
Contents of Samsung S22 user manual
The Samsung S22 user manual is very clear and easy to read. It describes how to use various features and lists the different buttons. The S22 has many useful features and is perfect for day-to-day use. It’s also very versatile and comes with a range of accessories, including a wireless charging pad. If you’re looking for a new smartphone for everyday use, the S22 is the one for you. This device is packed with features.
It will teach you about the many features and options on the Samsung S22. The manual is designed to be easy to read and is packed with information. It includes information on how to operate different features on the phone. It will also tell you which buttons to operate which features.
The Samsung S22 user manual is a comprehensive guide for new users. You’ll be able to find answers to a wide variety of questions as you begin using your new phone.
Purchasing a new Samsung S22 is a great investment for any new smartphone user. If you are in the market for a new phone, make sure you read the manual before you make a decision. It will walk you through all the features and give you tips on how to use them.
The S22 has a quad-camera, and it has a wide variety of settings. The Samsung Galaxy S22 user manual is easy to read and has troubleshooting steps that will help you understand how to use your new device.
Why need to read this manual
If you’re a new phone owner, you should read the manual before making any decisions. It will walk you through all the features of your new phone and give you tips on how to use them. The S22 user manual will also show you how to use the quad-camera and what settings you need to adjust for the best images. It is easy to read and includes useful troubleshooting information. And while it doesn’t look like much, it’s worth reading.
Apple’s iPhone is a great tool for chatting with friends and family. However, it can be difficult to learn how to use it, especially for older people. There are several ways to get around the touchscreen, including using VoiceOver and Speak Screen. Luckily, Apple provides an easy-to-understand guide that explains how to set up these tools. For the rest of us, we can just follow the tips of iPhone basics for seniors below to make the most of our new iPhone.
iPhone basics for seniors – how to use an iPhone
It can be a bit confusing to learn how to use an iPhone for seniors. You need to understand all of the options and make sure to read every word on the screen before you start interacting with it. There are a few tips you can follow when using your iPhone for the first time. A good way to avoid confusion is to keep the screen small and easy to read. You can also set font sizes and change the color of the phone’s screen.
Set up a small list of contacts. This makes keeping in touch with loved ones easier. You can set up an individual contact for each person and make sure to show faces in Messages. You can also use voice control and change the font size. If you’re concerned about accessibility, Apple has designed a range of settings that will help your iPhone work better for you. There are also many apps that are designed specifically for older users.
Create a small list of contacts. This will make it easier to keep in touch with family and friends. You can also set up a small group of contacts, including people you frequently visit. Setting up small lists of contacts will make it easier to see faces in Messages.
Set a large font size. You can also use voice control. And if you’re not techy, you can still use your iPhone for the basic things you need to do.
Set up a small list of contacts. It’s best to keep it to a few dozen contacts. You can easily message each one or call them each other. You can also change the font size to make the text easier to read. Once the device is set up, it’s easy to use. Remember that Apple’s free help is available at its stores. Its user-friendly interface is a great addition to a senior’s daily life.
Set up a small list of contacts. This will make it easier for seniors to keep in touch with family and friends. They can also set up a smaller list of contacts for easier access. Besides, they can also set up smaller numbers for their preferred text. They can also set up the iPhone so that the size is more comfortable for them to read. When buying an iPhone, it is important to compare the plans to ensure that it meets their needs.
The Samsung Galaxy A52 user manual includes important information for the new Samsung A52. It is also recommended that users read it thoroughly before starting to use their new device. The manual contains important information and tips on how to use the various features of the phone. You can also refer to it if you are unsure about how to use the phone. If you have a question, you can contact the company for assistance. In the meantime, you can download the PDF guide below.
Where to download Samsung Galaxy A52 user manual
The Samsung Galaxy A52 user guide is available in PDF format, so you can open it with any PDF viewer. You may have to download specific programs to convert the manual to another format. If you do not have access to the Internet, you can also download the manual and save it on your computer. The manual will be helpful in case you are experiencing problems while operating your phone. In this case, you should contact the manufacturer for further assistance.
The instructions for Samsung Galaxy A52 are simple. The manual is written in an easy-to-read format for newcomers and users. The basic functions of the device are explained in the manual. After downloading the manual, make sure to read the content carefully. You may find it useful to refer to it whenever you encounter a problem. Once you have the necessary information, you can move on to the next step.
You can also download the manual in PDF format using your computer. Once you have downloaded the document, you can view it with any PDF viewer. The manual is not in a specific format, so you may need to use special programs to convert it. You can also print or save it to your computer. There are some additional options for viewing the manual if you do not want to download it. There are many places to download the Samsung Galaxy A52 user manual.
Content of the Manual
The user manual for Samsung Galaxy A52 will contain all the important information and instructions for using the device. The manual will explain the different features of the phone. You can also find the application for the camera. It will guide you on how to use the contacts application. If you want to turn your phone into a PDA, you can download the user manual and the software needed for the phone. You can find it by searching for the model number on the manual.
The user manual for Samsung Galaxy A52 can be downloaded by using the internet. The file can be opened by any PDF viewer. It is important to follow all the instructions in the manual so that you do not damage the phone or receive error messages. The manual will also provide you with the necessary instructions to download and install programs for your phone. However, you should keep the manual in a safe place for future reference. Not all computers will have an internet connection.
The iPhone 13 handbook is a comprehensive guide to the newest smartphones from Apple. With tips and tricks for every function on the latest devices, this book will show you how to use your new iPhone more effectively and efficiently.
It covers everything from the camera to the features of the iPhone 13 Pro Max and Mini. You’ll also learn about how to get the most out of the new operating system, iOS 15. This is the ultimate guide for any user who wants to get the most out of his new iPhone.
Why you need to read iPhone 13 handbook
The user manual for iPhone 13 series is filled with useful tips and advice to help you get the most out of your new device. There are plenty of photos and videos to browse, so you’ll want to spend some time checking them out.
Moreover, the iPhone 13 user manual will help you find the best accessories to match your new iPhone. If you’re unsure of the features of your phone, you can refer to Apple’s official guide for information.
Apple will be unveiling a new series of smartphones, including the iPhone 13. The line includes four different devices: the iPhone 13, iPhone XS Max, iPhone XS, and iPhone XR. The iPhone 13 Mini is the smallest affordable model, but it shares several features with the basic iPhone 13.
It will also feature an improved processor and a smaller notch. The next generation of smartphones will be released in September 2021, with the iPhone X.
Apple has removed the home button on the iPhone for several years, but the new version of the phone has a Touch ID fingerprint sensor.
You can also swipe up from the bottom edge of the screen to return to home. The iPhone 13 has a more advanced OLED display, which means you’ll never have to worry about misplaced fingers anymore. And thanks to its 6.1-inch OLED display, it’s more comfortable than ever.
Content of Apple 13 manual
The iPhone 13 handbook is designed to help users get the most out of their new device. It will provide you with all the necessary tips for using your new iPhone. The iPhone 13 handbook contains the most important information about the new features and functions of the phone.
You’ll also find a detailed guide for the new camera. If you’re looking for a user manual for the iPhone 13, check the Apple Store’s website. You’ll be happy with the results.
The iPhone 13 user guide covers the entire new phone. It also covers the new camera. The iPhone has a new camera, which makes it easy to take pictures and videos. The iPhone 13 has an improved front-facing camera, which improves the quality of images. But it also uses a more expensive battery.
Regardless of what you’re looking for in your new iPhone, you’ll find a lot of great information in its user manual.
To maximize the benefits of your new Samsung Galaxy A32 smartphone, it’s a good idea to get a user manual. These guides are essential when you’re using a new product, and they can be useful even if you’re a seasoned techie. You can find Galaxy A32 user guide in the Samsung App Store, and you can view it at any time to review its features.
Where to download Samsung Galaxy A32 user guide
The Samsung Galaxy A32 user guide can be downloaded for free through this website. If you have any difficulty accessing the manual, you can ask a friend or family member to help you. These guides are also available online.
To download your manual, you will need a free account. The manual is in PDF format, which means that you can read it on any computer with a PDF reader application. You can also print out the manual to reference later.
The manual for your Samsung Galaxy A32 is available in PDF format, so you can easily download it and refer to it whenever you want. The guide is available in English, Spanish, and German. If you don’t understand the manual, ask someone who can. Then, he or she can help you out. If you can’t understand the manual, ask a friend or family member to do it for you.
The Samsung Galaxy A32 user guide is available in PDF format, so it’s easy to download it. If you’d like to have a copy, you can sign up for a free account at the Samsung App Store. You can even share the link with your family and friends. We hope you’ve enjoyed reading the user guide. Please consider sharing it with your friends and family. Keep reading!
If you’re a beginner or senior user, this manual can help you learn the ins and outs of your new Samsung Galaxy A32. With its ample RAM and memory capacity, this phone will be the best buy for you this year. So, don’t delay and download yours today! For Your New Samsung Galaxy A32 Smartphone – A Must-Have for Your Device! It’s Essential
Why you need user guide for your new phone?
A user guide is important if you’re planning to use your new smartphone. The manual will help you find the right settings to use your phone. You’ll also find out the different functions of your new smartphone. Moreover, it’ll help you learn about its many features. With a PDF user guide, you can get all the information you need to make the most of your device. This manual is useful in many ways.
Using your new phone can be complicated. You need to know how to properly use it to maximize its benefits. For instance, you can use the features you’ve never seen before. This manual will help you set up your new device. This guide will also help you choose the right accessories for your new smartphone. The Galaxy A32 5G battery has a 5,000mAh battery and supports fast charging. The manual will explain the settings for both the battery and the phone’s battery.
Gaming mice are important equipment for gamers. The right model can help you to improve your performance and win over other players. Razer offers the Naga, a premium mouse that is designed for comfort and functionality. It has a customizable scroll wheel and an illuminated paddle. The battery life is excellent, and it is reasonably priced. A good option for beginners is the Logitech G502 for casual gamers. In addition, it has 12 programmable buttons and a USB port.
The best gaming mice on the market
The Razer DeathAdder V2 is a high-end gaming mouse that is a great choice for serious gamers. It has RGB lighting and two mechanical buttons. Unlike some other gaming mice, the Razer DeathAdder has long battery life. The build is edgy and comfortable. It has a rubberized grip for comfort. It is lightweight and can last for several hours. However, it is not wireless.
The Basilisk V3 is an excellent choice for gamers who want to play in a high-definition environment. The slim, lightweight, and super-durable PTFE skates are a boon for gamers. With a 2.4GHz wireless connection, the Basilisk V3 is an outstanding option. The low weight, sleek design, and sensitivity of the Basilisk V3 are additional advantages. In addition, the Razer Burst Pro Air is also a great choice for those who want to use their computer for gaming.
A gaming mouse has a plethora of features to suit the needs of a gamer. Most of them come with programmable buttons and adjustable weights. Many also come with additional features like a dedicated sniper button. But, the most common reason why gamers buy a gaming mouse is that they feel the mouse is more intuitive and are better equipped to play games than a regular keyboard. You’ll be surprised at the features and options available in a single device.
Things to consider before buying gaming mouse
The specs of a gaming mouse are critical. A high-quality mouse will provide more than enough functionality. It must also be comfortable and offer plenty of settings. A better mouse is more responsive. Its polling rate should be higher. A high-quality mouse will be sensitive. The best-quality model will be more precise. So, you’ll have to make sure that you’re comfortable using it. It’s important to select the right one.
The gaming mouse has an optical sensor, which allows you to click, scroll, and hover. Optical switches are also available. A gaming mouse’s DPI is determined by the number of clicks per second. When the ball is moving, the sensor will automatically switch the position and the color will change accordingly. It’s also possible to adjust the DPI. If your mouse’s DPI is too high, you’ll have to press the right button to change the direction of the cursor.
Arctis 7P/7X is a very comfortable and versatile gaming headset. It features a clear microphone and customizable controls. It is also easy to clean and has a long battery life. Most of these gaming headsets feature an elastic headband and soft ear cups. These are excellent options for those who prefer a more comfortable fit. Weighing just under two pounds, this headset is one of the most comfortable on the market.
Whether you play PC or console games, you’ll want to get a high-quality headset to keep you safe from COVID. It’s easy to get a headband that fits comfortably, but don’t spend too much time adjusting it. Most of us don’t spend much time outdoors. That means a high-quality gaming headset is an essential investment. Moreover, you’ll want to get a pair of headphones with a good quality microphone and speaker for better sound clarity.
Tips to choosing the best gaming headsets
There’s a lot of jargon in the gaming headset industry. The T3 headset guide provides a handy reference to its terminology. There are many factors that determine the price of a headset, but here’s a short rundown of the most popular types. You’ll find the best headset for your needs and your budget. There are numerous models out there – just remember to do your research! If you’re looking to buy a new headset, be sure to choose one with a reputable brand.
There are also different types of gaming headsets. While noise canceling is better at isolating higher-pitched sounds, it’s better for reducing low-pitched sounds. However, for gamers who aren’t looking for a high-quality headset, a more affordable option might be the SteelSeries Arctis Pro. This gaming headset has a comfortable headband and a wireless connection that don’t break the bank.
While price is a very important factor when buying a gaming headset, it’s also worth considering the quality. A good headset should be able to deliver high-quality audio, but it should also be comfortable to wear. Despite the lack of comfort, the Astro A10 is a solid gaming headset. Its sleek design will compliment your PlayStation 5 and Xbox Series X/S, and it works with all types of games. The sleek design of the Astro A10 will make your online gaming experience even more enjoyable.
Conclusion
Gaming headsets with better sound quality have better drivers. This is necessary because the sound output is crucial in gaming. A good headset should be able to filter background noise, even in noisy environments. Its driver is the most important part of a gaming device, and it should be durable and long-lasting. Further, it should have a noise-canceling microphone and speaker drivers. The Arctis 1 does not offer a wireless option, but the comfort level is still great.
Wireless printers are convenient to use. They can be placed anywhere you have a decent Wi-Fi connection, without any wires. You can even tap the printer to connect to your computer using near-field communication. There are also some printers that have built-in infrared transceivers. Once you have found the wireless printer that fits your needs, you can start installing it. Here are some tips to help you choosing cheap wireless printer.
One benefit of a wireless printer is that it doesn’t need to be close to the network port on your computer or router. You can put it anywhere you want. A wireless printer is also more likely to support mobile printing and save space on your desk. These devices are also more affordable than their wired counterparts. In addition to being more convenient, a wireless printer can be very energy-efficient, making it a great choice for home or office use.
Guide to choosing a Cheap Wireless Printer
If you’re a home or office user, a wireless printer can be an excellent choice. This type of printer is great for anyone with a wireless network. It can be placed anywhere in your home or office and can be easily accessed from anywhere else. If you’re unsure of where to place the printer, you can simply attach it to the wireless router. If you’re a businessperson, a wireless printer may be a good solution for you.
When choosing a wireless printer, you should consider how many computers you have. Then, choose the best model for your needs. Most wireless printers can accommodate up to 20 users, so it’s important to consider how many computers you’ll have in your home. A multi-function printer is a great way to save money on ink and toner. It’s also important to consider your space needs, as space can become limited if your home office is too large.
When choosing a wireless printer, remember to consider the different types of networks you’ll have. Having multiple networks can help you save money on the costs of replacement cartridges. It also allows you to save on electricity. When choosing a wireless printer, consider the needs of the people who will use it most. A wireless printer can be a useful tool for all types of users. You can choose one that suits your needs the best. You should also consider how many computers you’ll need to connect to the same device.
Conclusion
Wireless printers are also a great option for home-office use, since they don’t require cables. In addition to saving on the cost of replacement cartridges, a wireless printer can also save on the cost of replacing the entire machine. If you’re working from home, consider purchasing a wireless printer instead of several wired units. Most wireless printers will work with the same network, so make sure you’re on the same network as your phone.
A wireless router is a small network device that performs the functions of a router, including enabling access to the Internet. In addition to providing access to private computer networks, a wireless router can also serve as a wireless access point.
If you’re unable to connect to a wireless network, you can still connect to the internet. You can use a wireless connection for the convenience. This type of router also allows multiple devices to share the same Internet connection.
Tips to choose best wireless router for gaming
Some of the most popular routers available today have built-in smart features. Smart Wi-Fi Apps are a great way to manage your network and prevent unwanted devices from joining it.
You can create separate networks for gaming and other activities, assigning certain client devices-high traffic priorities. The Router Web Interface also allows you to manage your network from a computer. This makes it easy to monitor, manage, and even control your network from afar.
Some gaming routers offer a MU-MIMO or multiple access points. This means that your gaming device will get priority traffic. This is important if you regularly play online games or use your router for gaming. MU-MIMO can ensure smoother graphics and minimize lag.
Besides boosting the quality of your game, a good gaming router can help you enjoy multiple devices and maximize your overall signal strength. These devices are also useful for households with multiple devices, since they can prioritize traffic to specific devices and avoid overlap.
A gaming router can also offer a dedicated bandwidth for gaming. A good gaming router should offer a dedicated bandwidth for gaming, while other devices on the network can be ignored.
A good QoS feature will prioritize the use of bandwidth among multiple users based on their activity. A quality QoS setting will also help your gaming PC to stay connected for longer. It’s important to consider these features before making a purchase. You can find the best wireless router for your needs with a little research.
The price
The best gaming routers are not expensive, but they can be a bit more complicated to setup. You can use a management app to monitor and adjust network settings. An antivirus program can also help protect you from online threats. It’s not only free, but it’s also free.
In addition to that, many games require the best router for optimum performance. A gaming router should prioritize gaming traffic and not affect other users on the network.
A wireless router should provide a range of options for gaming. A gaming router should allow more bandwidth than other types of devices. It should also have parental controls, which are important for parents to control the internet.
Finally, a gaming router should offer a dual-band connection. Both bands can benefit from the same speeds. However, they can be difficult to find a gaming router that supports more than one. The most advanced devices should support both bands.
If you’re looking for a great gaming controller for the PlayStation 4, there are many different options out there. There are plenty of controllers you can use, and some of them will be better suited to certain games than others. Some of these options will be discussed below. The first one is the DualSense, which is the best controller for PS4. This controller has a lot of great features. It also has a nice price and is a good choice for many people.
A gaming controller for PlayStation 4 is a must-have for anyone who owns this console. Its features and functionality will allow you to get the most out of your gaming experience.
The DualShock 4 is compatible with both the PlayStation 3 and PlayStation 4 systems. It has a built-in microphone and is designed with gamers in mind. The Sony wireless PS5 controller features a 3.5mm jack for audio and has an enhanced stick design.
The Sony wireless controller is available for $219 and measures 6.9 x 18.8 cm. It weighs 500 grams and has a built-in speaker and stereo headphone jack.
Performance of gaming controller for PlayStation 4
A gaming controller for PS4 can be expensive, but it’s a worthwhile investment if you play a variety of games. Higher-end controllers will offer more features and adjust dead zone and stick sensitivity. They’re also often compatible with all PS4 games.
However, you’ll need to spend a little money to get the best performance. A good choice is the DualShock 4, which is the perfect gaming controller for a wide range of games.
You can also buy a wireless PS4 gaming controller. This is a great option for gamers who want to enjoy wireless functionality. The Dual Vibration wireless handle offers responsive buttons.
The vibration effects vary according to the state of the game. It also has a dedicated switch for adjusting the volume. You can even customize the vibration effects by using the backlit illuminated keys. The redgear wired controller supports X-input mode.
The DualShock 4 is compatible with most games, but the DualShock 4 is compatible with PS4 and is cheaper. It also has a Bluetooth connection, which makes it compatible with most games.
This wireless controller is an ideal choice for a PlayStation gamer looking for a gaming controller. When it comes to the PlayStation 4, you can choose the one that suits your needs the best. The DualShock 4 will be a great companion to your PC.
The DualShock 4 is a great gaming controller for the PS4. The DualShock 4 is available in gold, silver, and red. Some users may prefer the latter, while others might opt for the former. Both controllers offer different levels of customization, but if you have a large hand, you can opt for the Xbox One.
You can even purchase an extra wireless PS4 controller to pair with your headset.